This is an abbreviated how-to–if you want to see the complete how-to including variations and untying instructions and more, check out my knot course, here.
How To Tie the Taut-line Hitch Video Instructions
How To Tie the Taut-line Hitch Picture Instructions
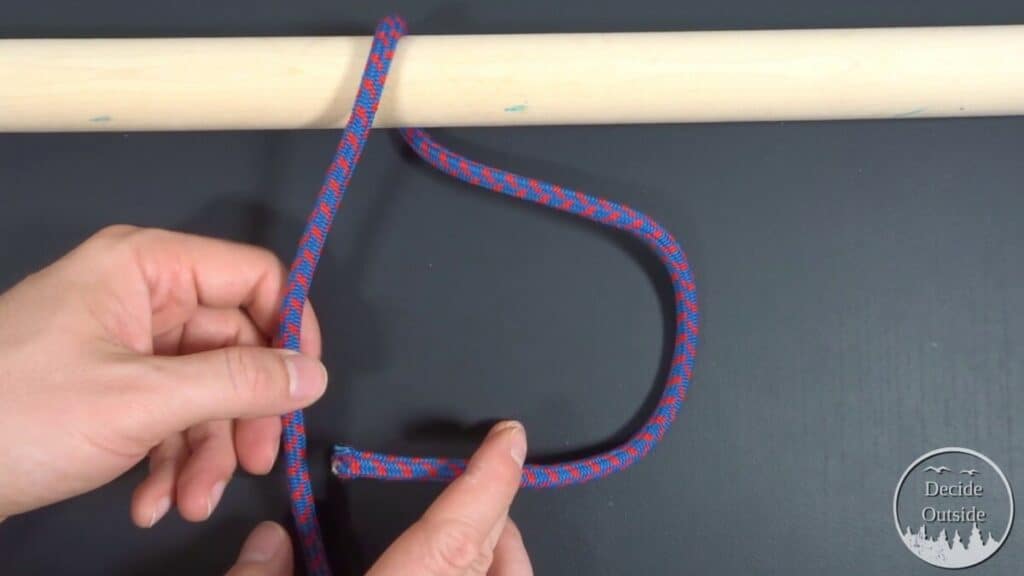
Step 1: Wrap your rope around an object clockwise so that the working end is in your right hand and the standing part is in your left hand
Step 2: Make an overhand clockwise crossing turn (see glossary for details)
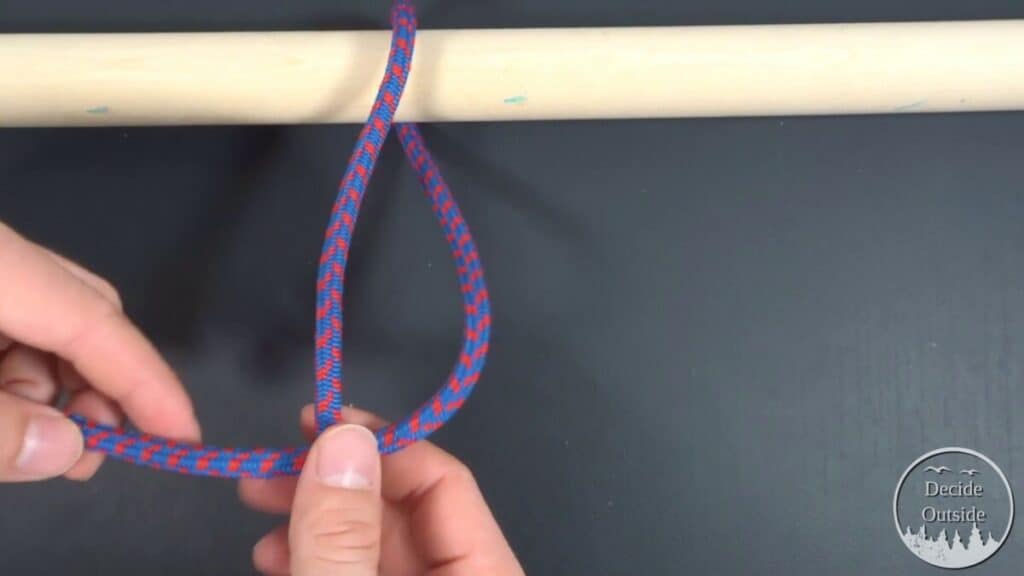
Step 3: Make a half hitch by passing the rope around the standing part and through itself
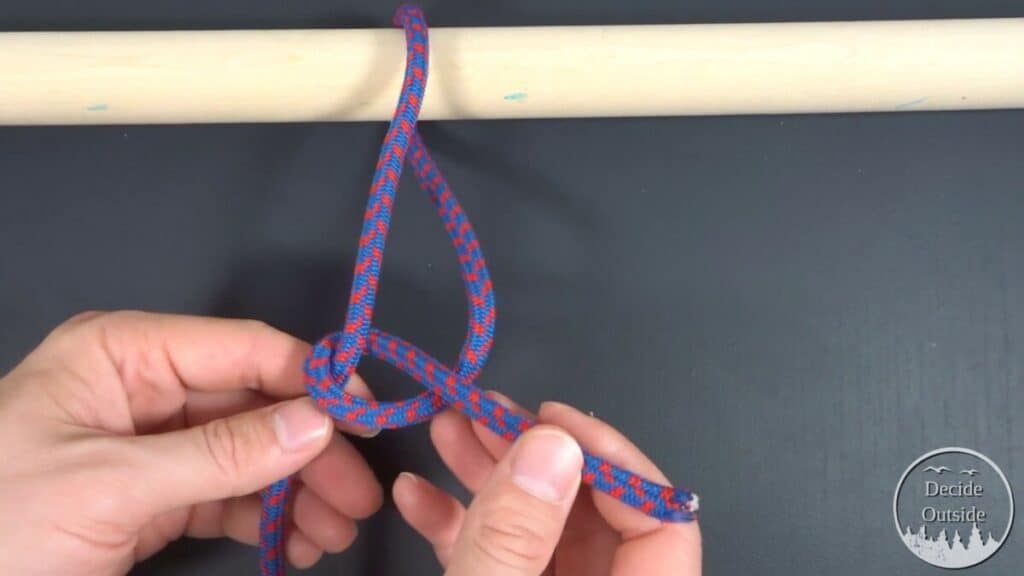
Step 4: Pass the working end back around the standing part, forming an X.
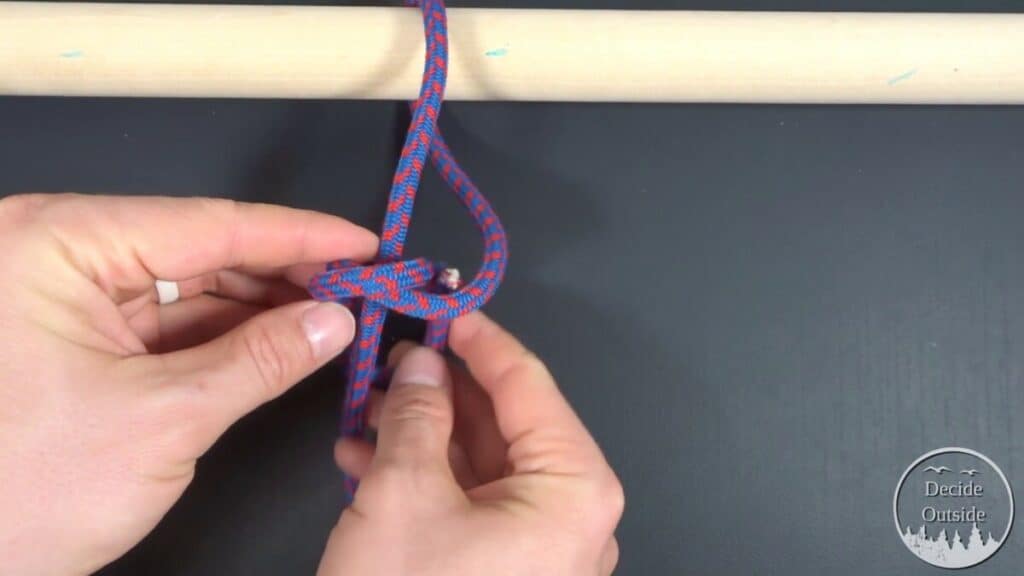
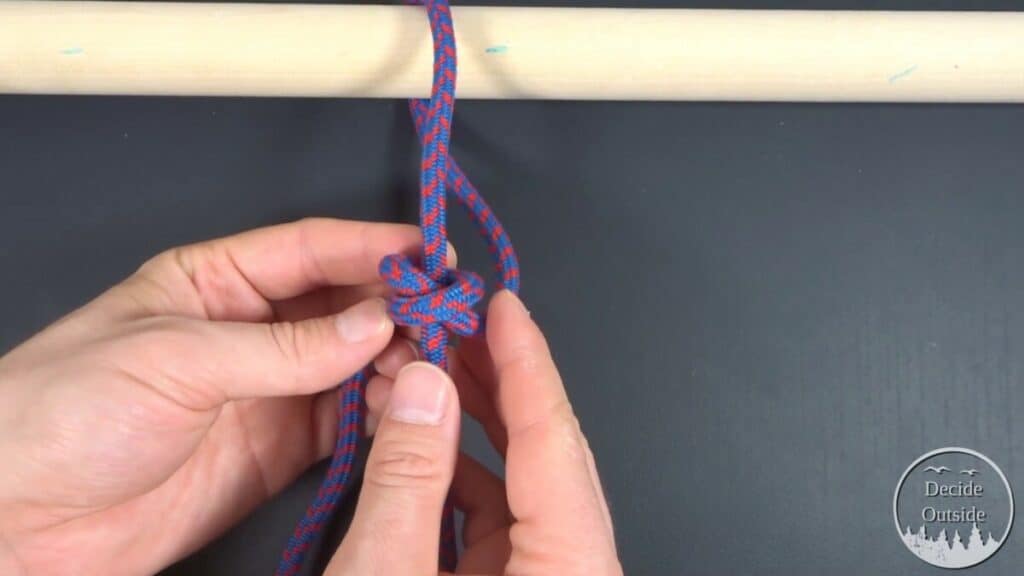
Step 5: Pass the working end back around the standing part, the working end should go under the previous wrap.
Step 6: Pull the working end through (should look like a clove hitch)
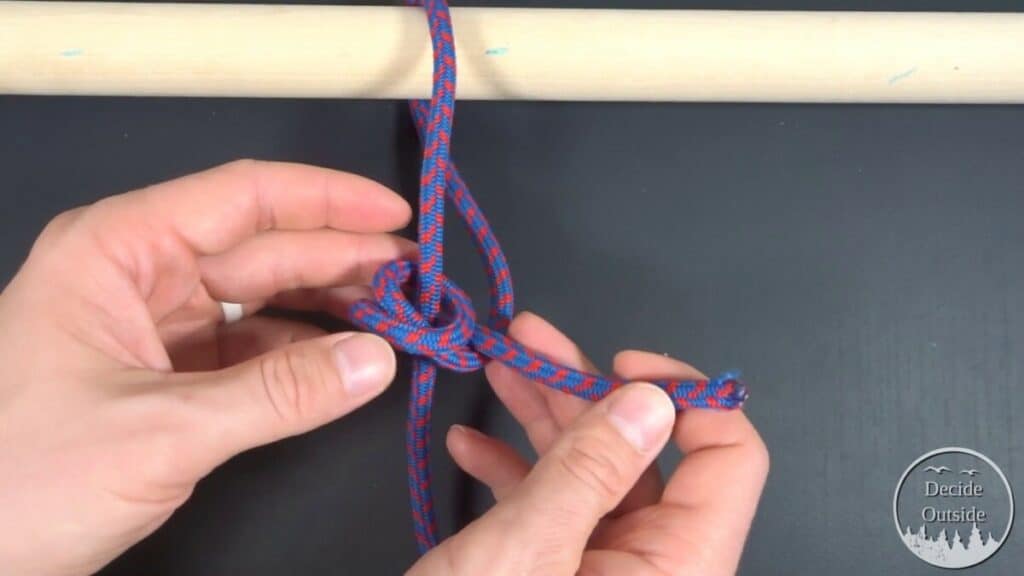
Step 7: Put the working end over the standing part on the other side of the initial half hitch
Step 8: Wrap the working end around the standing part and pass it through forming a half hitch
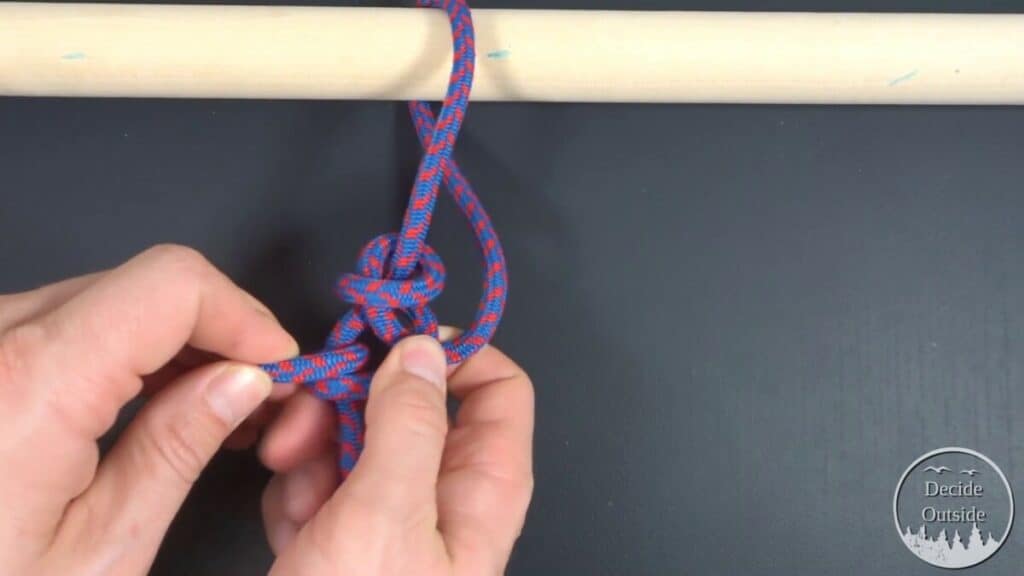
Step 9: Pull the working end through to tighten the half hitch
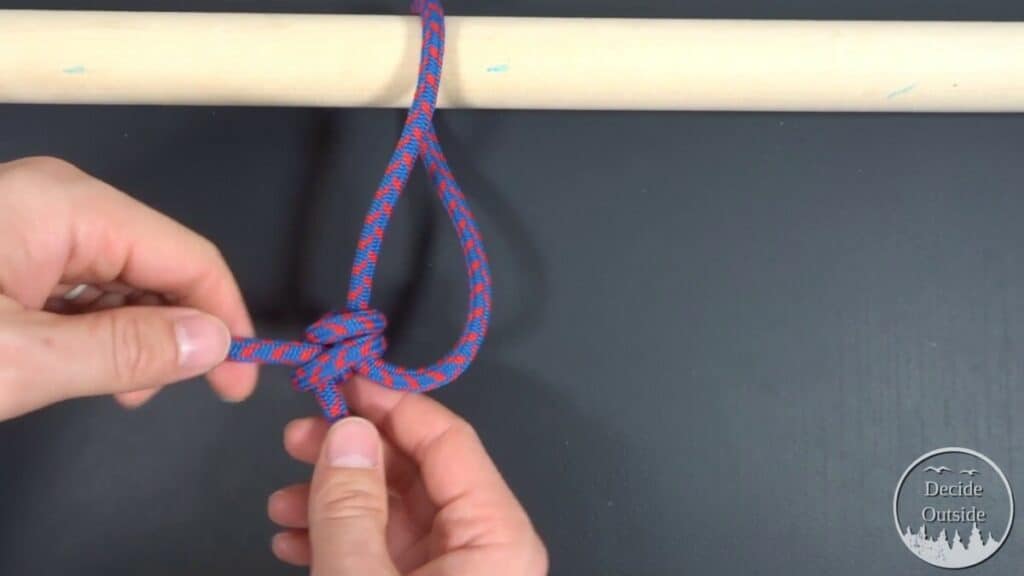
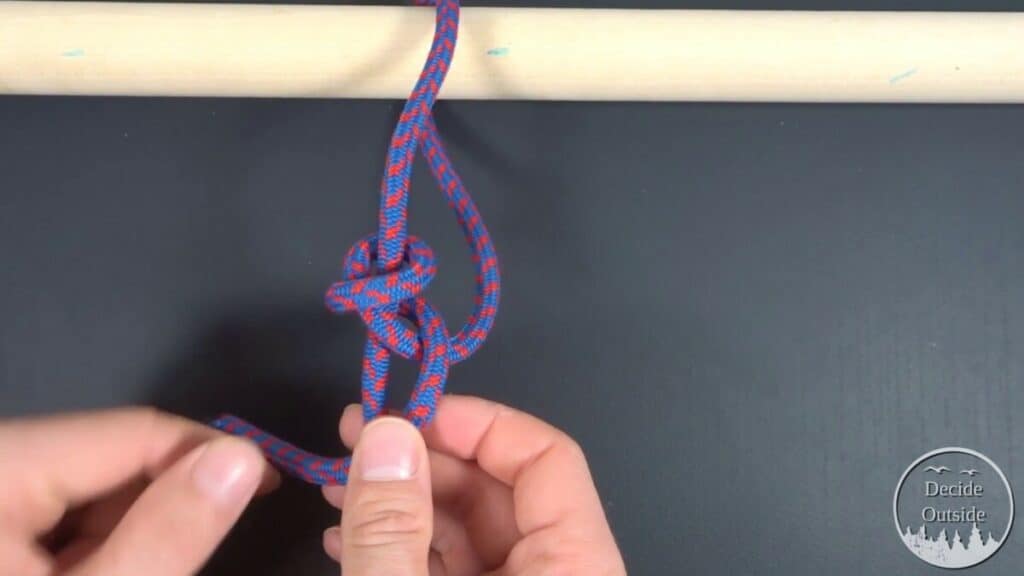
Step 10: Tighten all wraps around each other, you can pull the knot away from the hitching object to tighten the rope. (adding more rope to the loop)
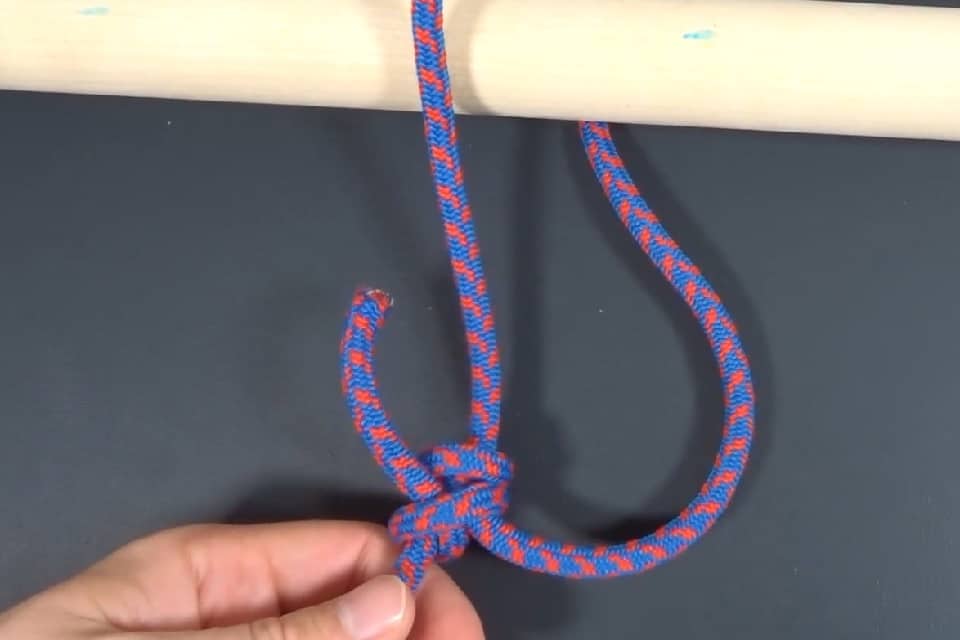
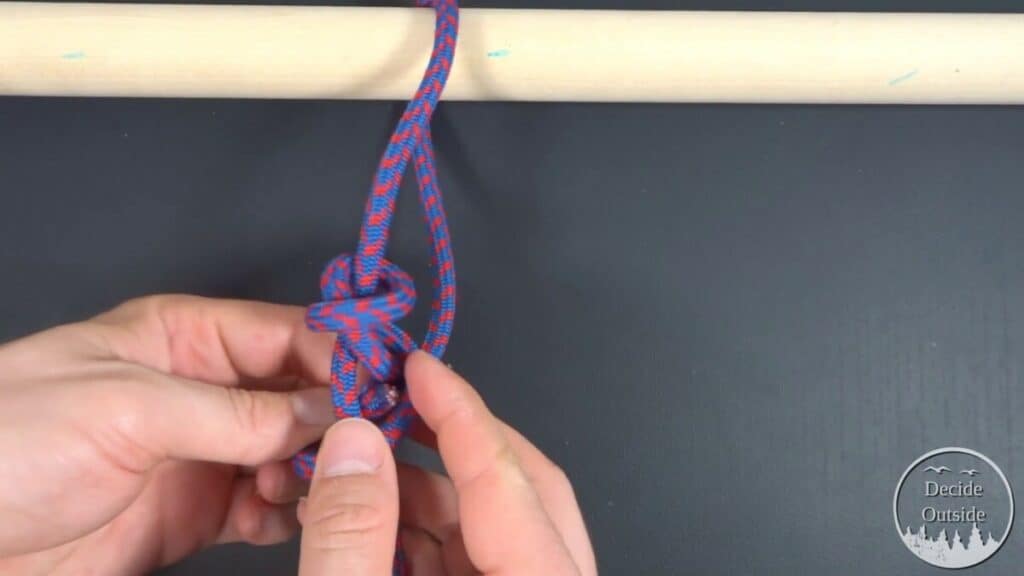
Finished Taut-line Hitch