Selecting the best knot for tying two ropes together (the technical term for this is called a bend and we’ll call it a bend for the rest of this article) is hard! There are dozens of different bends and knowing when to choose which knot can be tricky. My goal is to give you an arsenal of bends so you will know the best bend to use in whatever situation you come to.
Tying two ropes together is called a “bend” and we’ll call it a bend for the rest of this article.
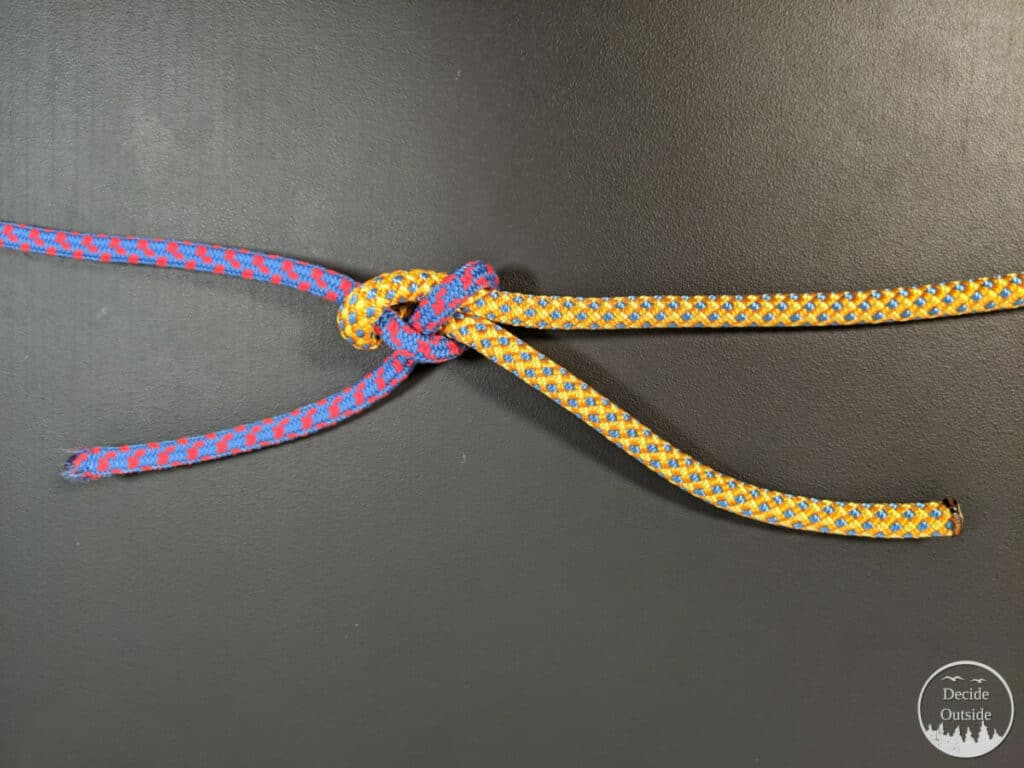
The Sheet Bend: Easy To Tie, Easy To Remember, Best For Different Diameter Ropes
Now, whoa there, maverick! I know what you’re thinking: “I’ve heard that the sheet bend is not secure and not strong!” And… that’s true!
The sheet bend in its plain vanilla form is not that strong and not that secure, but it is easy. Don’t worry, the sheet bend can be tremendously helpful especially if you tie the double sheet bend.
By the way, as an Amazon Associate, I earn when buying qualified products through links on my site.
Why would I recommend a knot that isn’t the absolute strongest? Because it’s easy to tie and easy to remember. An actual knot that you can remember is better than fussing with the rope and coming up with some made-up knot can lead to trouble.
Advantages Of The Sheet Bend:
- Can be used to tie two ropes of different diameters. (such as is shown in the picture, above)
- Easy to Tie
- Easy to Remember
- Easy to strengthen with the double sheet bend
- Can be modified to flatten out the bend making it ideal for situations where you don’t want the bend to catch on things
Disadvantages Of The Sheet Bend
- Insecure if not doubled
- If not tucked, can get caught on things
How To Tie the Sheet Bend Video Instructions
How To Tie The Sheet Bend Picture Instructions
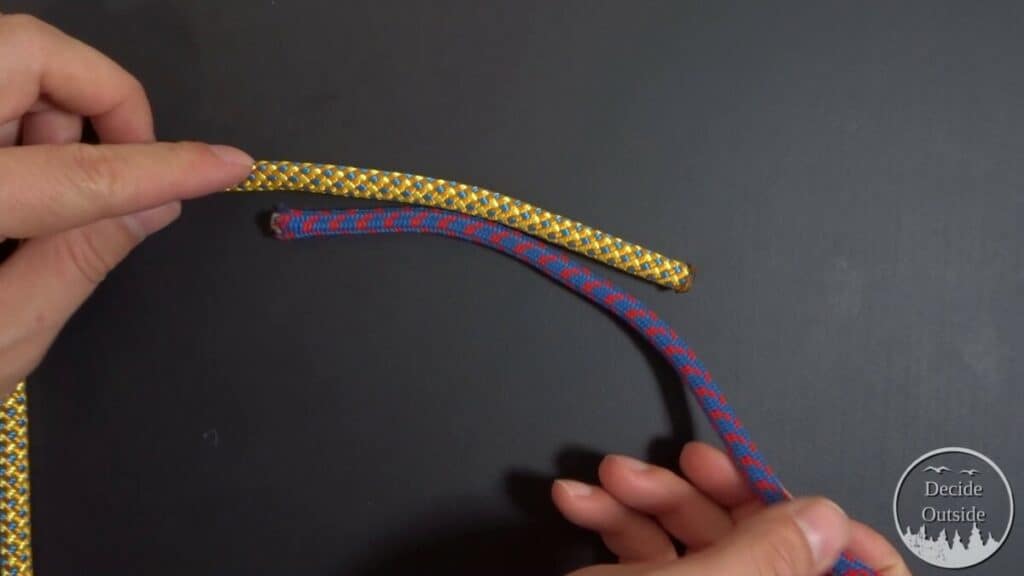
Step 1: Pick the larger diameter rope to be the left rope (Rope A) and the smaller diameter rope to be on the right (Rope B) Also, if they are the same diameter, it doesn’t matter.
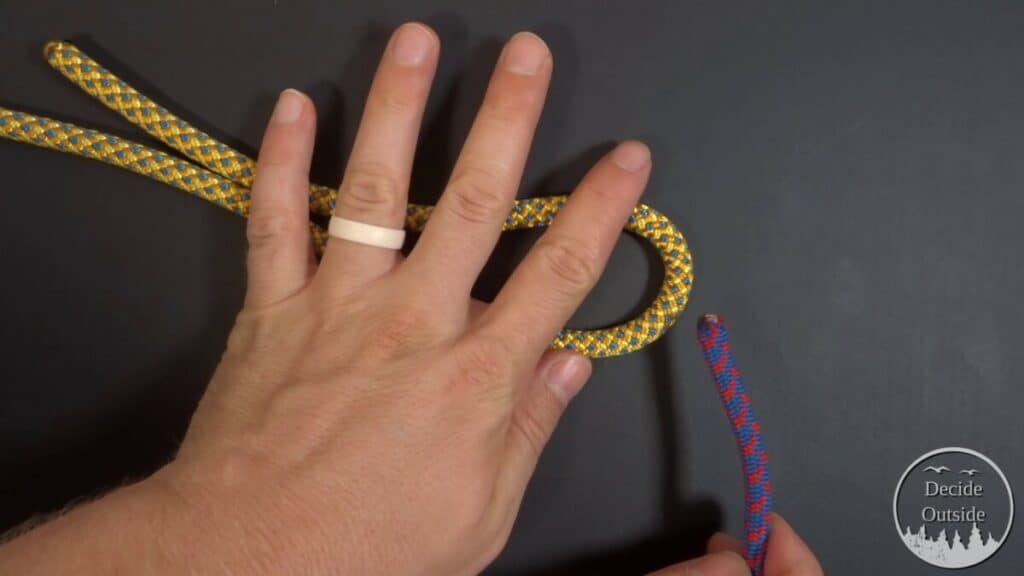
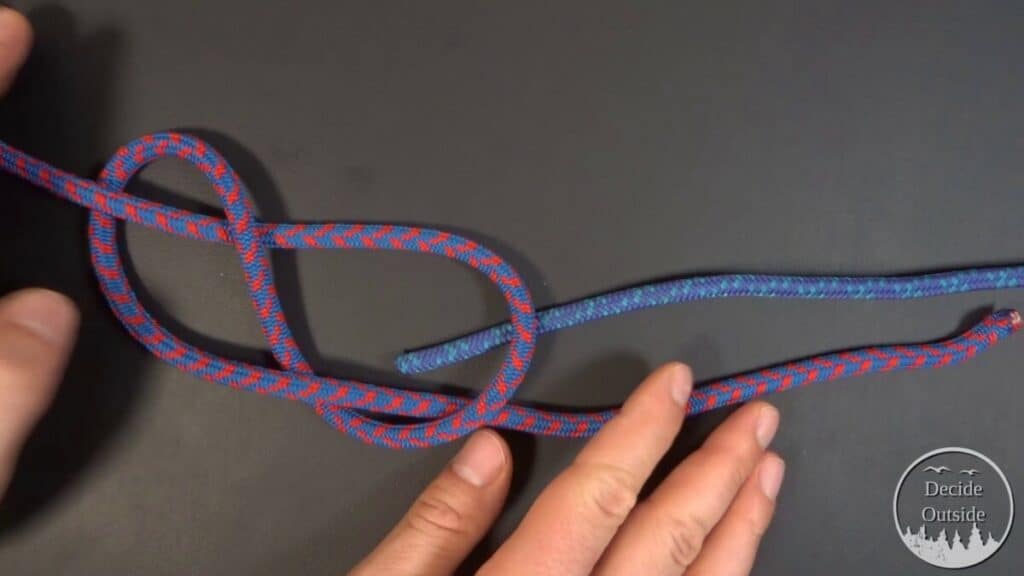
Step 2: Form a bight with the rope on the left (rope a).
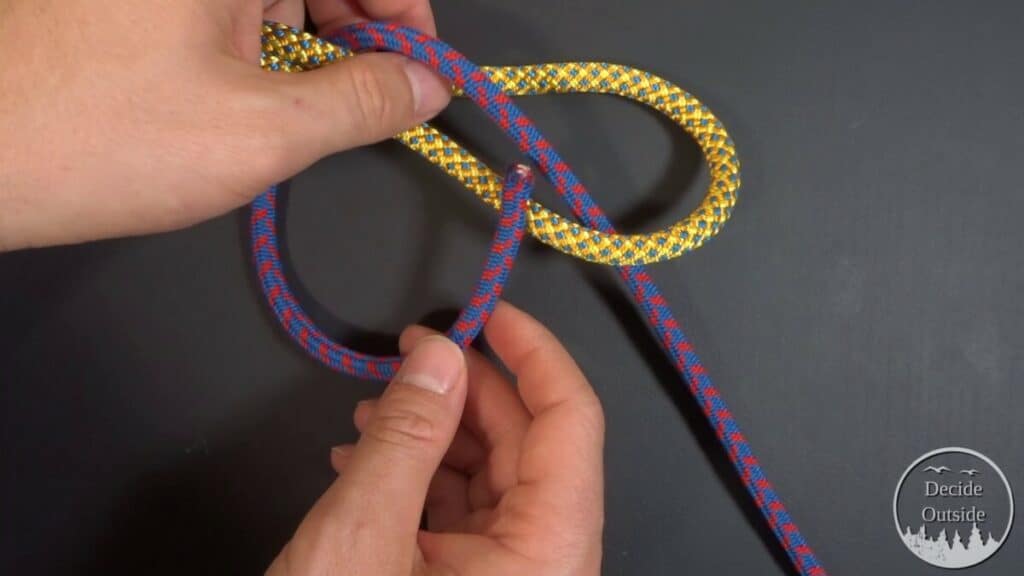
Step 3: Take the rope on the right (rope B), and pass it through the underside of the bight and pass it over the top of the bight and then under both two lines in rope A in the bight.
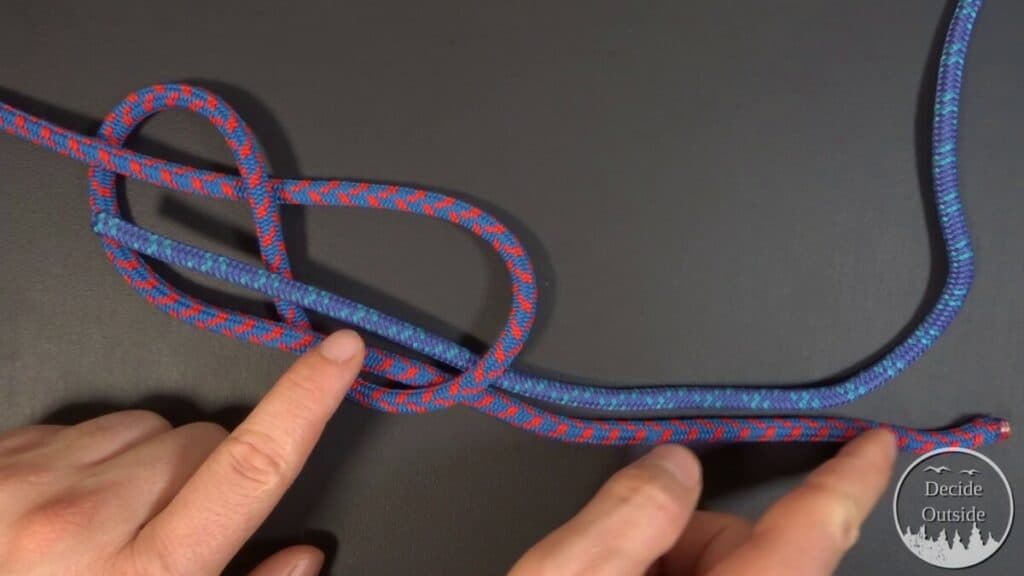
Step 4: Pass Rope B underneath itself, but OVER the top of the bight in rope A, forming a half hitch.
Step 5: Pull both ends of the bight on rope A and Rope B in opposite directions to tighten
Doubling The Sheet Bend
In Step 4, you pass rope B underneath itself to form a half hitch. You can add an additional wrap around rope A and pass it through to form a round turn and a half hitch. The end result should look something like this:

Variations
Besides doubling, you can also take the (now) perpendicular working end of the sheet bend and pass it underneath the bottom of the Rope B wraps. This will bring rope A and Rope B parallel. It should look like this when finished:
Fisherman’s Knot: Strong, Very Secure
The fisherman’s knot (actually a bend) is an incredible bend. It can be doubled (similar to the sheet bend) and if put under load can be difficult to untie.
You should use the fisherman’s knot when you want to knot worry (sorry… it had to happen at least once in this article) about the bend coming undone.
The fisherman’s knot isn’t too difficult but can be a bit tricky to remember.
Advantages of the Fisherman’s Knot
- Very secure when doubled. This bend is used by climbers
- Strong. HowNot2 (source) found that the Fisherman’s Knot would break at around 19.15 kN of stress (WAY more than you would ever need) with climbing rope.
Disadvantages of the Fisherman’s Knot
- Can be a bit tricky to get the knot right. You have to fuss with giving yourself just the right amount of slack
- Can be a bit tricky to remember
- Can slip if not doubled
- Not ideal for joining ropes of different diameters
Don’t get me wrong, Fisherman’s knot is a fantastic knot, and I would trust it more than a sheet bend, any day.
How To Tie the Fisherman’s Knot Video Instructions
How To Tie the Fisherman’s Knot Picture Instructions
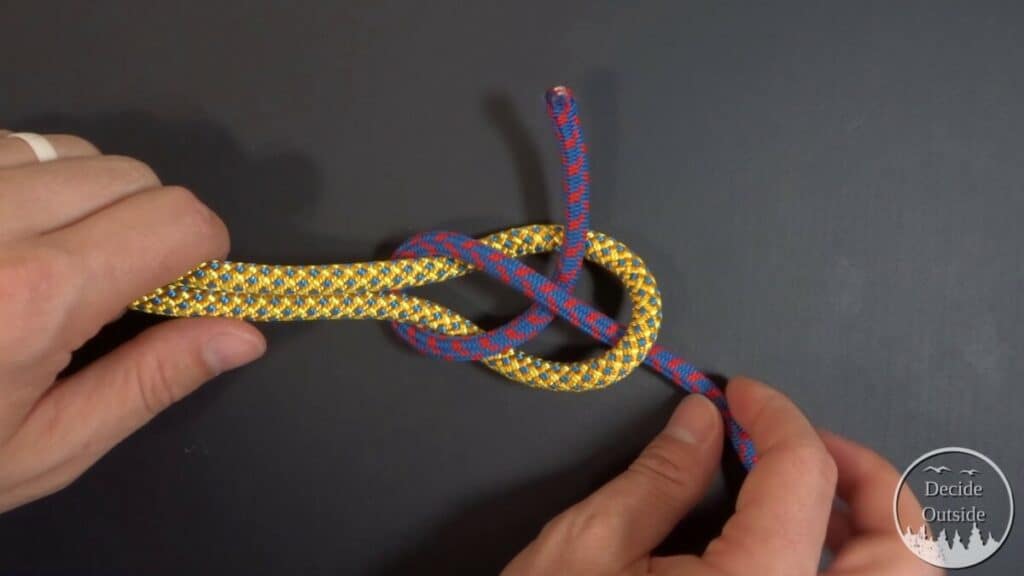
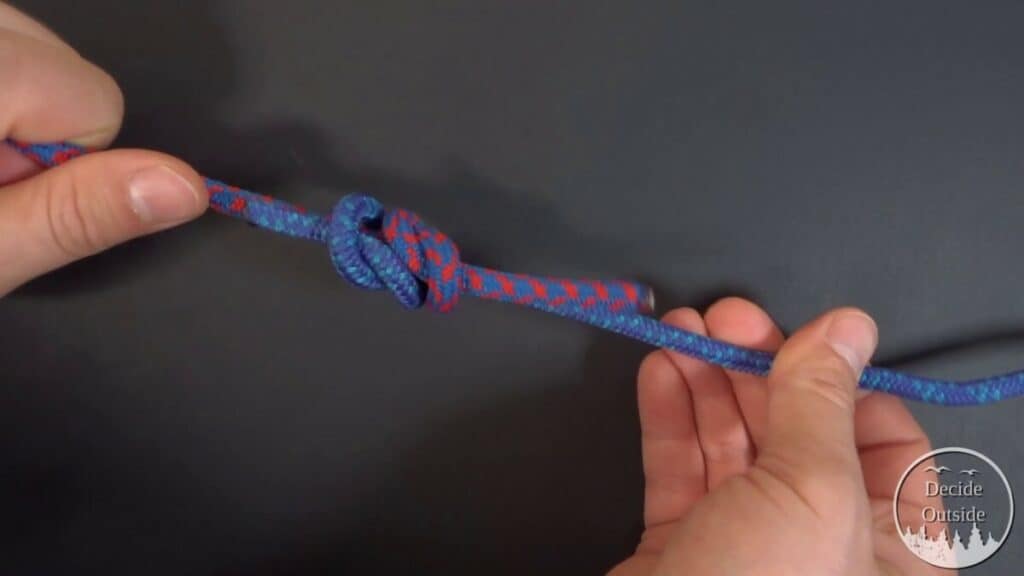
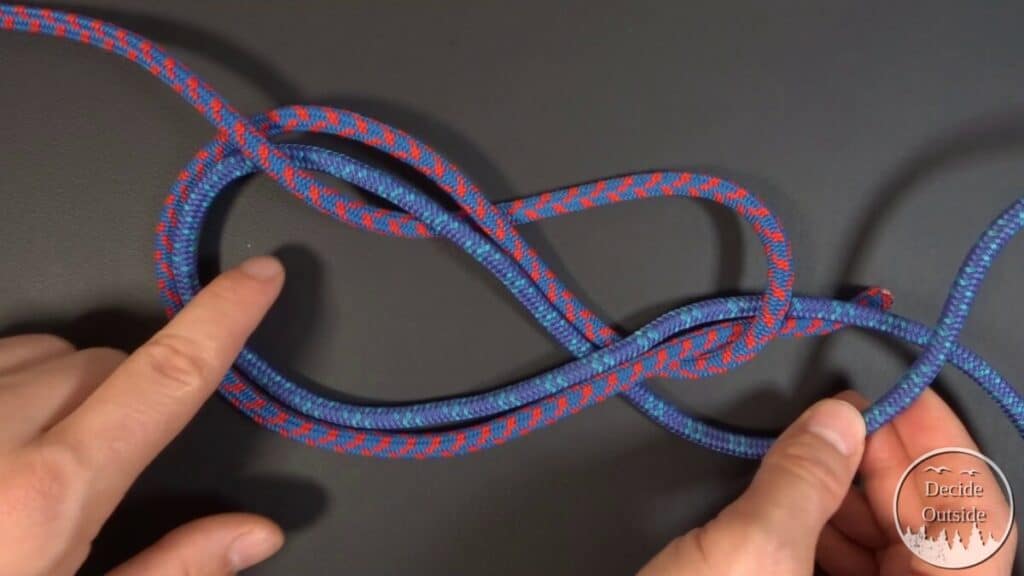
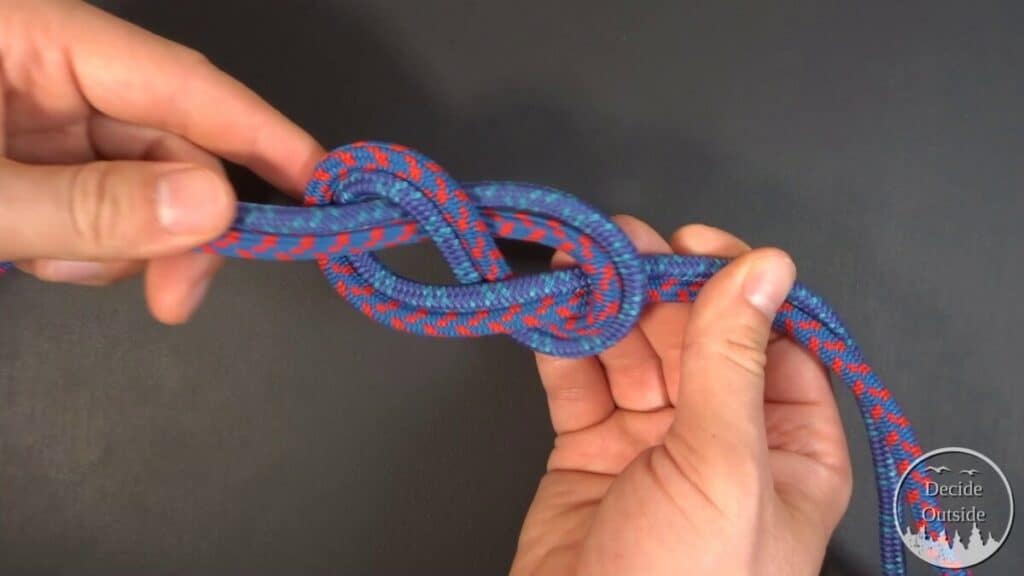
Step 1: Put the two ropes side by side. The Blue rope I’ll call Rope B, and the purple and red rope I’ll call rope A
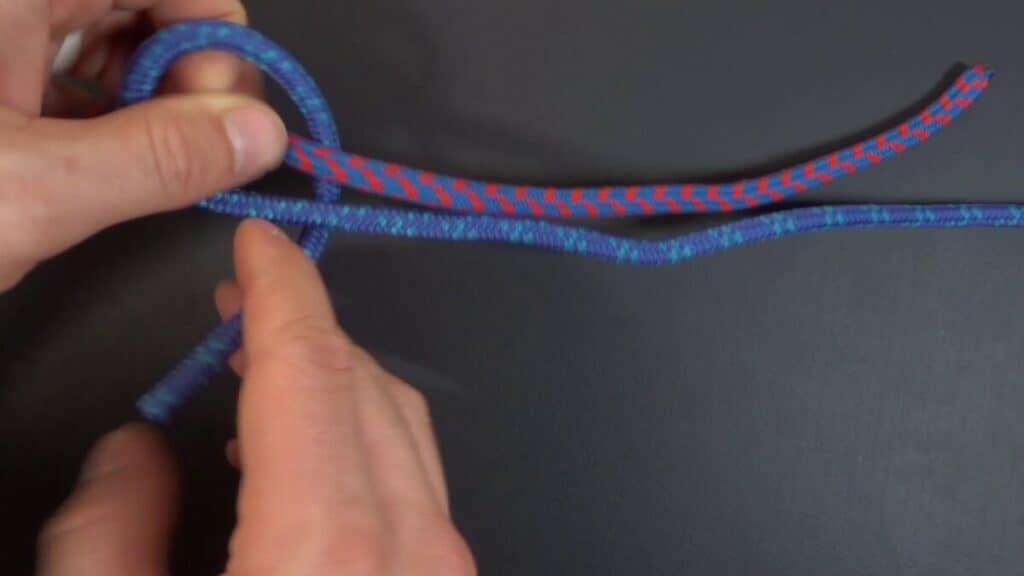
Step 2: Take Rope B and pass it over and under rope A and also underneath itself
Step 3: Pass Rope B and pass it through itself without crossing Rope A. This forms a sort of overhand knot.
Step 4: Take Rope A and repeat the same process on the other side, except pass Rope A over and under rope B and underneath itself.
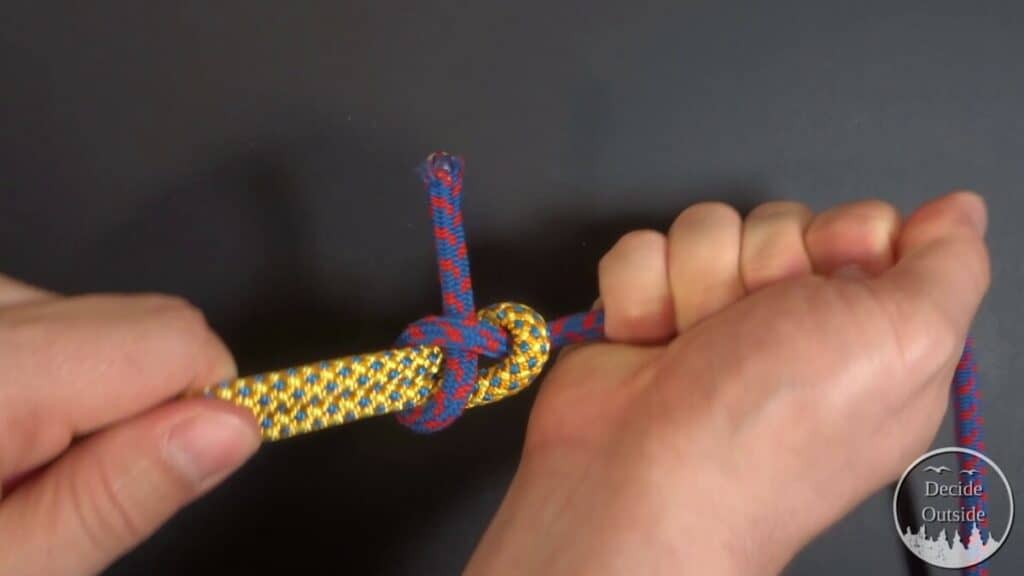
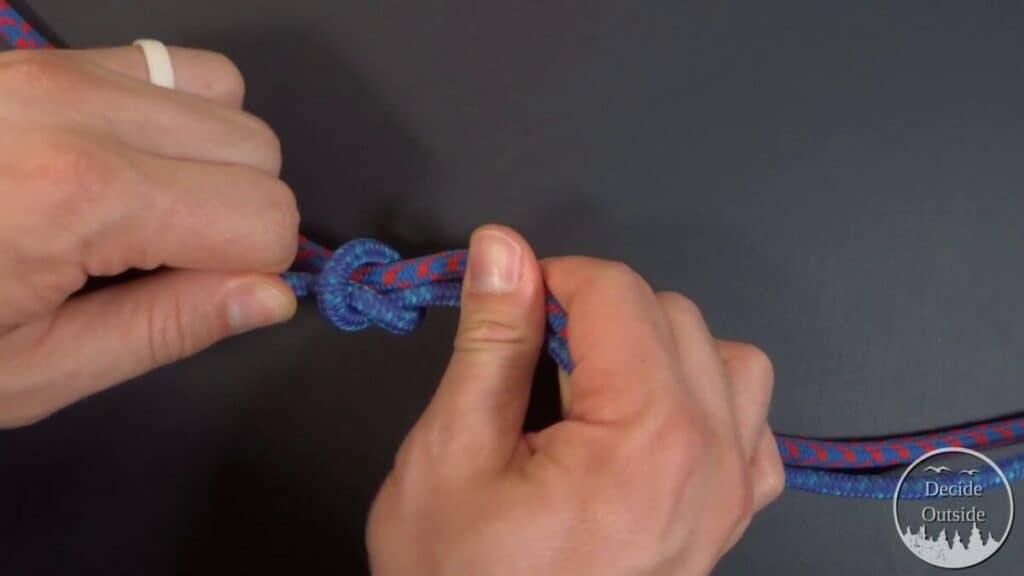
Step 5: Take rope B and pass it through Rope A, forming an overhand knot.
Step 6: Take both standing parts and pull them in opposite directions–this will snug up both ends of the fisherman’s knot against one another.
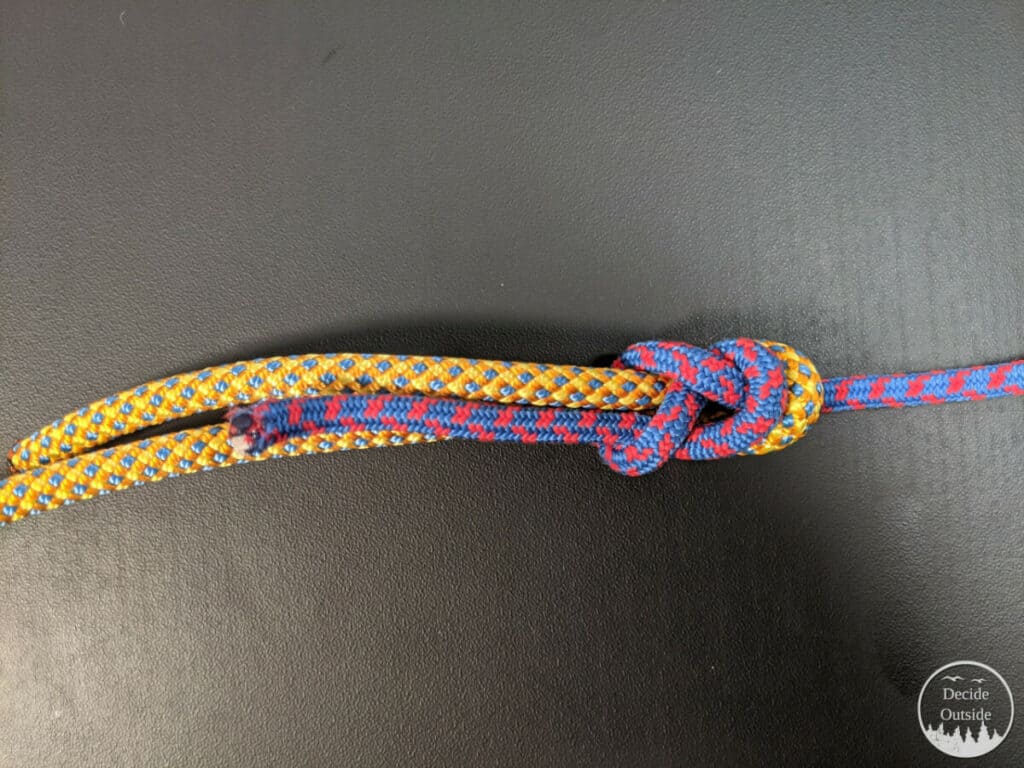
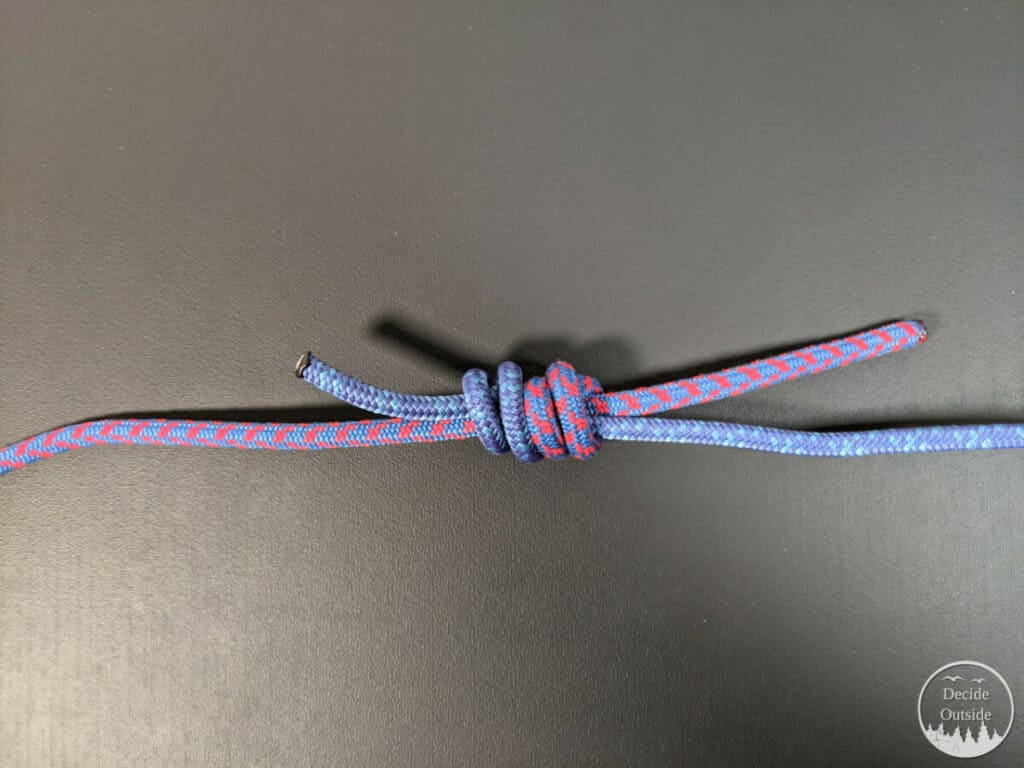
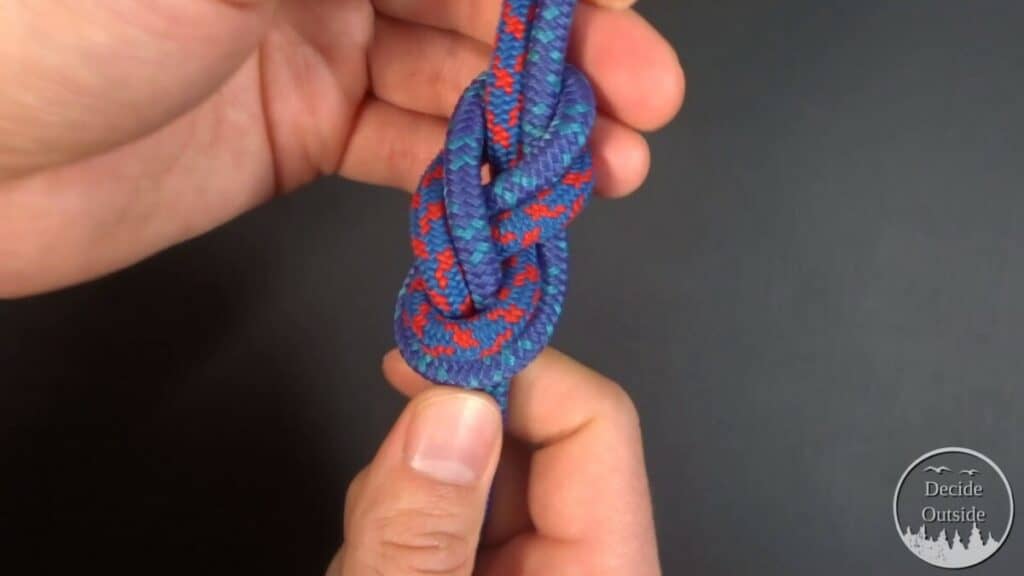
Doubling the Fisherman’s Knot
You can double the fisherman’s knot by making an additional wrap before pulling the line through itself to form the overhand knot. This is what it should look like when you’re done:
The Flemish Bend: Very Strong, Fairly Straightforward, Climbing Knot
The Flemish bend (rethreaded figure-of-eight) bend is an elegant and powerful knot. The Flemish Bend is used extensively in climbing to tie yourself into the lead line.
It’s not perfect, but it’s about as strong and secure a bend as you can make.
Advantages of the Flemish Bend
- Strong: the Flemish Bend doesn’t have any sharp turns, it’s one of the strongest bends you can use HowNot2’s tests rate it around 17+ kN breaking strength
- Secure: For climbers, being secure is almost more important than strength.
- Straightforward: the Flemish bend, once you learn the pattern, is easy to remember.
Disadvantages of the Flemish Bend
- If you don’t fair up the Flemish Bend, properly, it is exceptionally difficult to untie when put under load. Even if you do fair it up, this is a difficult bend to untie.
- Time-consuming: The Flemish bend is not hard to tie if you remember how to tie a figure of eight, but it takes a bit more time than other knots. You have to carefully rethread the line and keep the lines stacked properly, so it takes some concentration. If you’re holding the knot while you’re tying it that can make it tricky.
How To Tie the Flemish Bend Video Instructions
How To Tie the Flemish Bend Picture Instructions
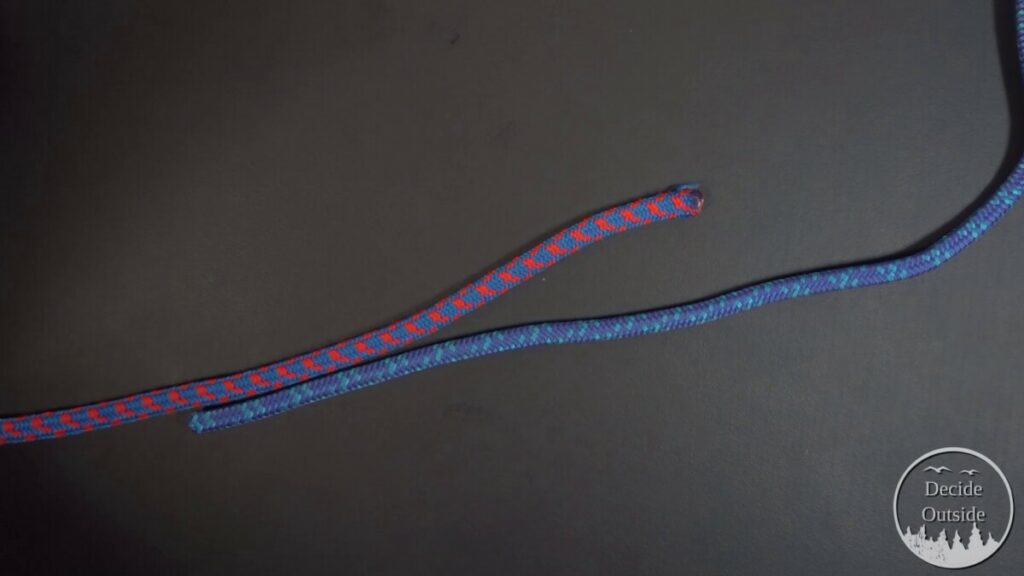
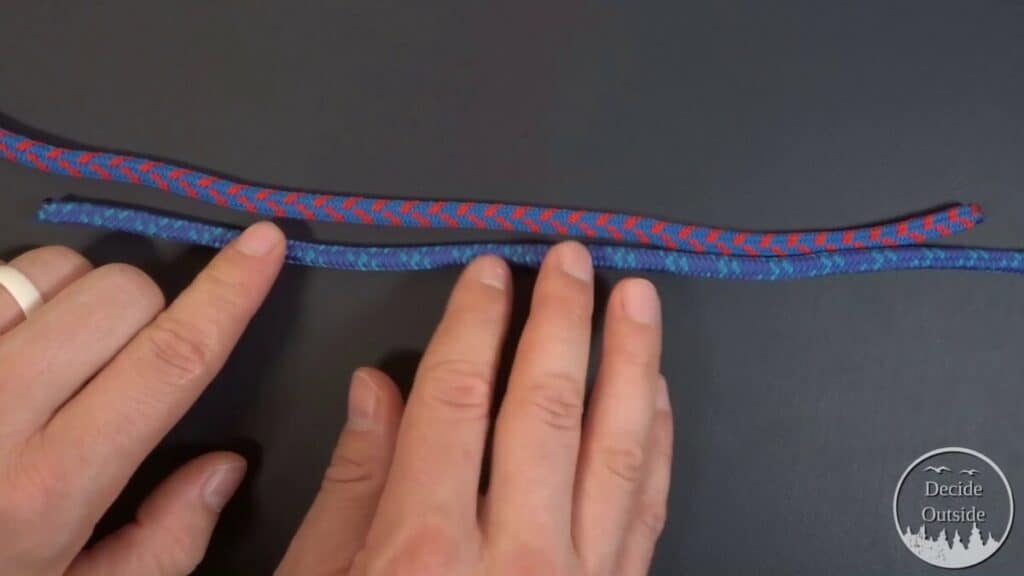
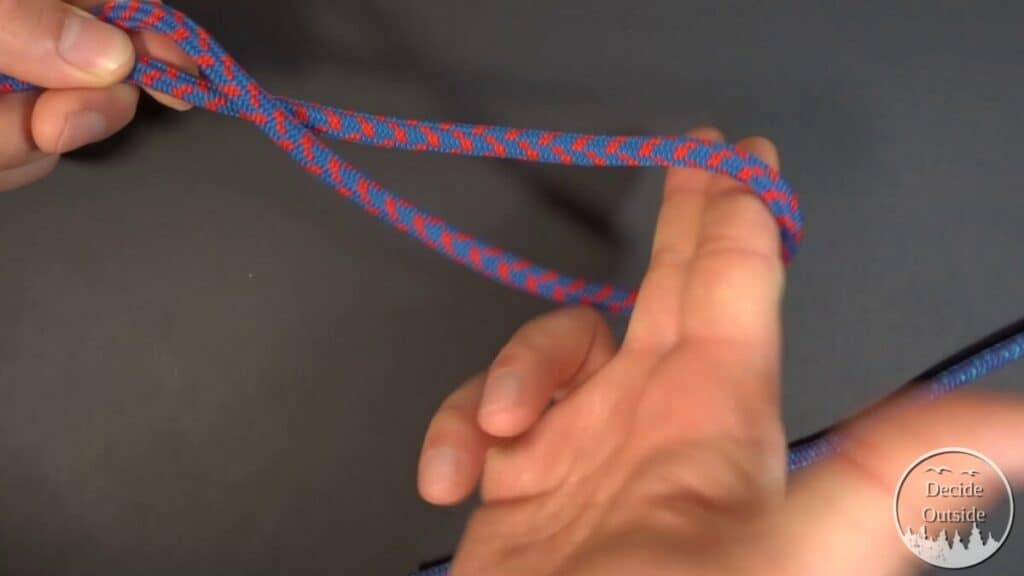
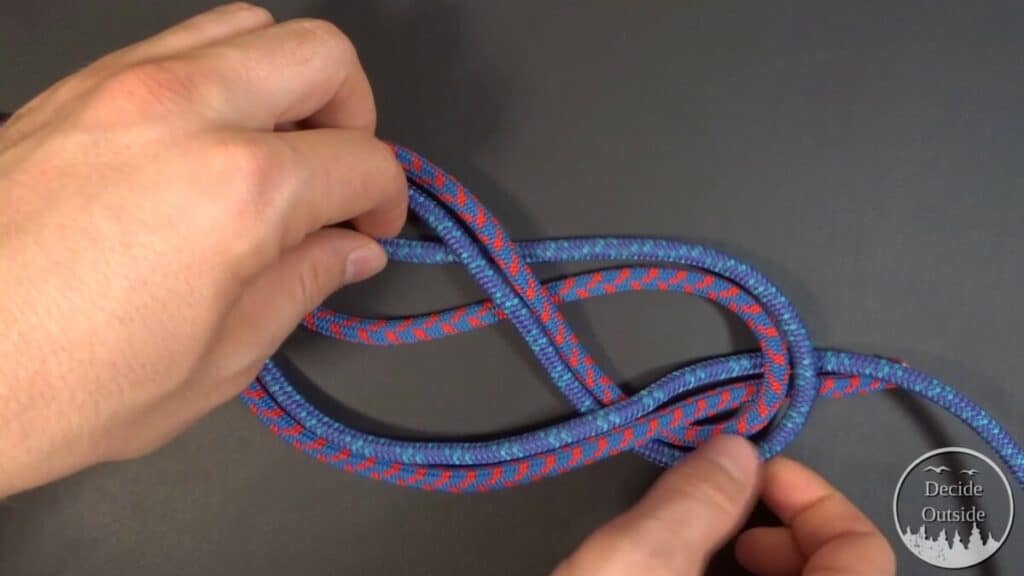
Step 1: Line up the two lines parallel to one another. The red and blue rope is Rope A, the blue rope is Rope B
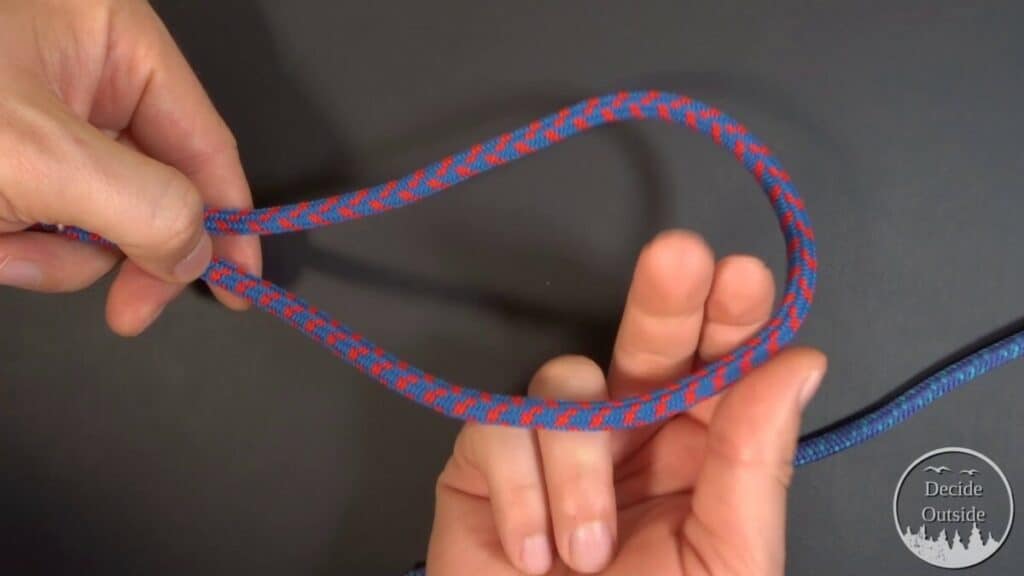
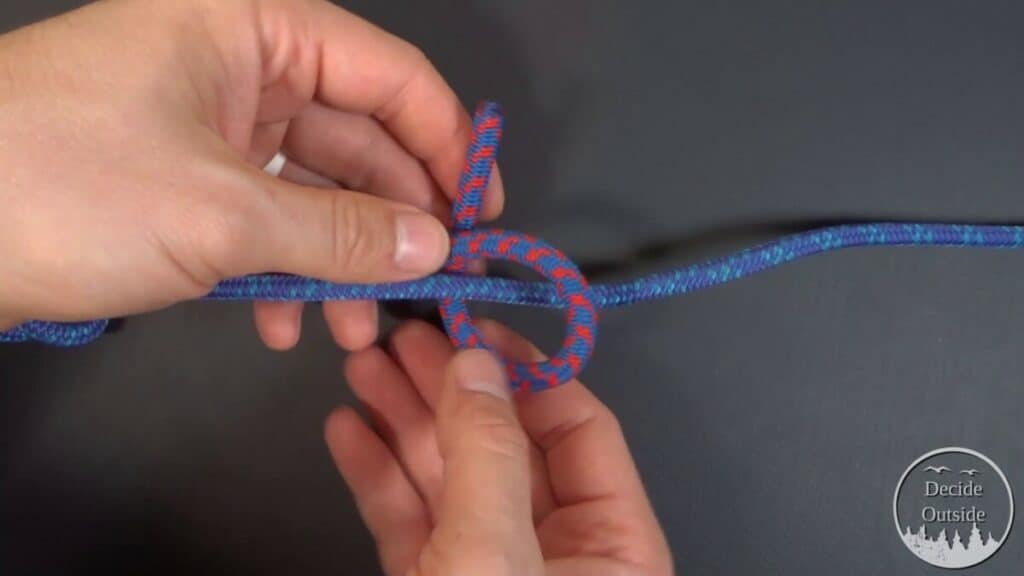
Step 2: Create a bight with Rope A and place your right hand through the bottom of the bight
Step 3: While keeping the bight in place with your left hand, twist the right side of the bight in rope A around counterclockwise until your fingers are going through the top of the bight.
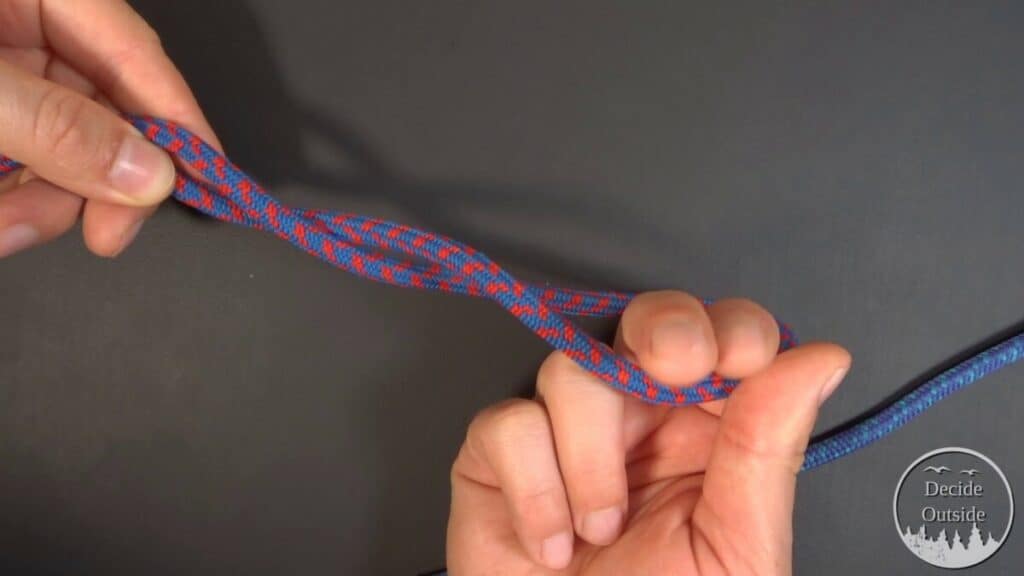
Step 4: Maintain the pinch of the bight with your left hand and then turn around the bight with your right hand one more time until your fingers are pointing towards yourself again.
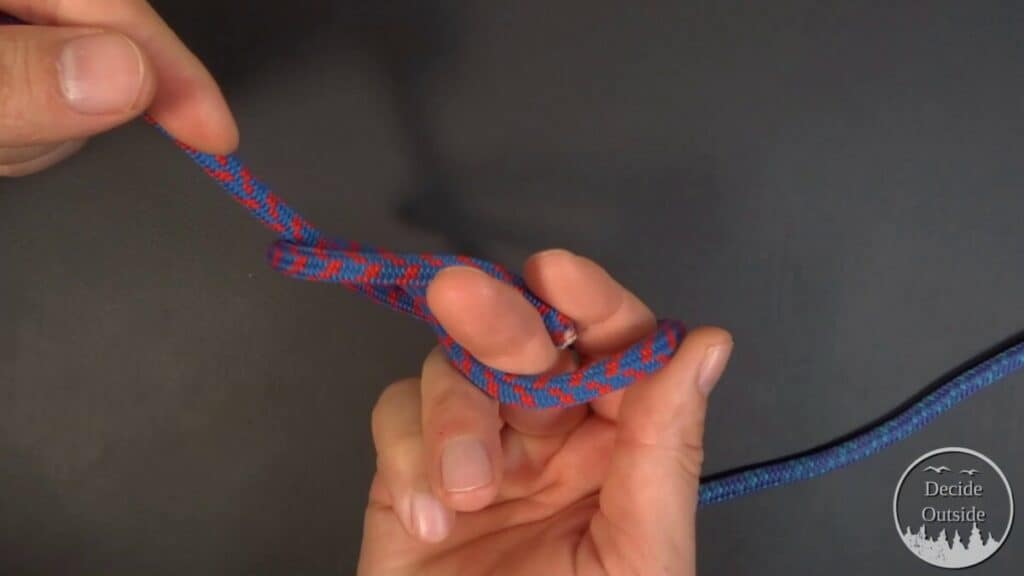
Step 5: Take the end of the bight and pass it through the twisted end you have in your right hand for Rope A.

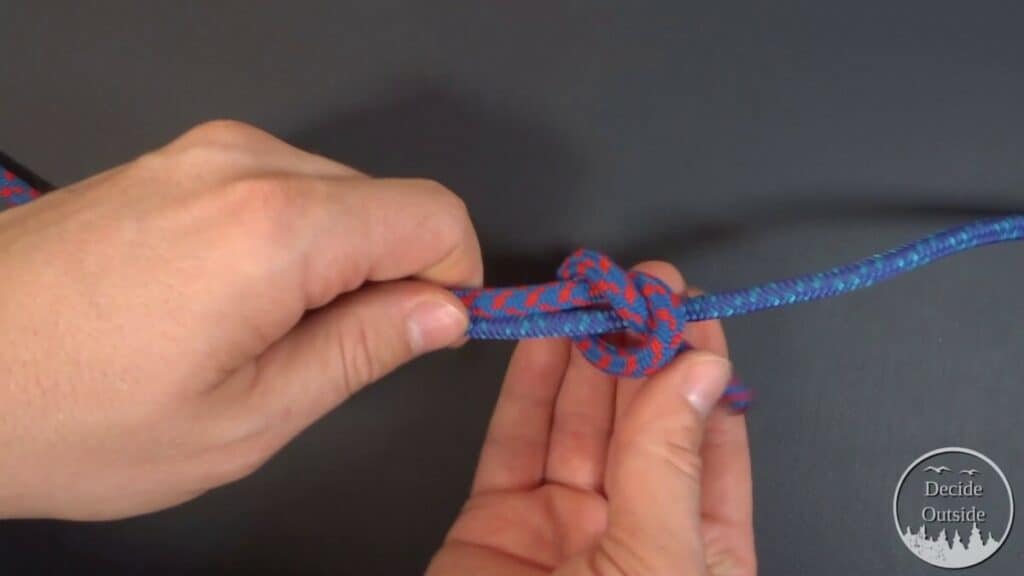
Step 6: Pull the line through to form a figure of 8 on Rope A
Step 7: Loosen the figure-of-eight knot and give yourself plenty of lead line with Rope A
Step 8: Place Rope B parallel to the working end of Rope A
Step 9: Start rethreading Rope B along the path of Rope A making sure you stay on the same side of Rope A the entire time
Step 10: Take Rope B along Rope A, make sure not to cross the lines and to go over the standing part (the line coming from the upper left of this picture)
Step 11: Pull the line through, notice how rope B is on the same side of Rope A the entire way
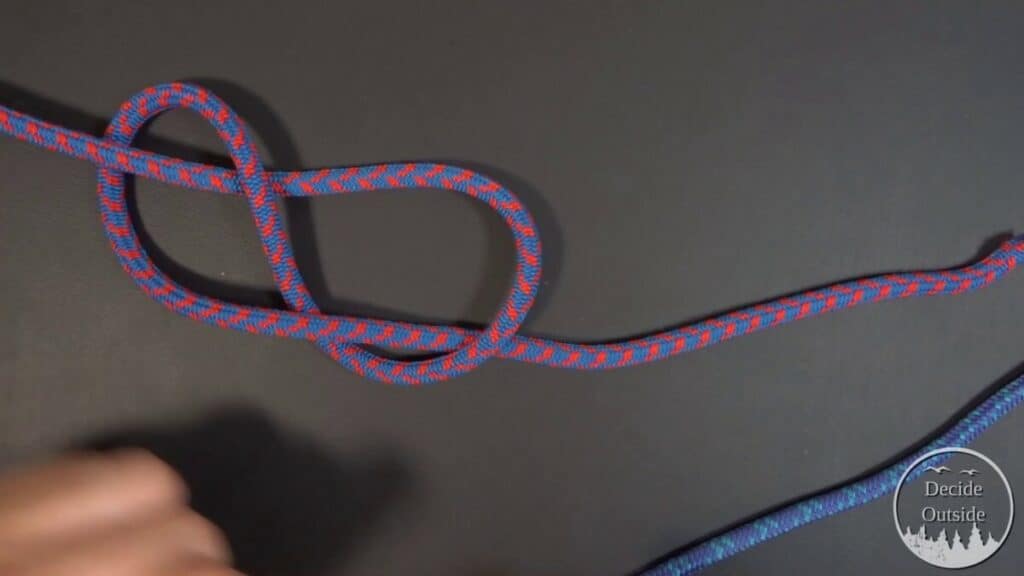
Step 12: As you pull all lines, the bend should look like this where you don’t have any lines crossing
Step 13: Rope A and Rope B should be stacked on opposite sides as you tighten. Make sure to pull this tight to prevent lines getting crossed as it tightens under load.