Y’all, the feeling of being able to set up a tarp shelter with just a bit of rope and a tarp is awesome. But, it takes some know-how. Not as much as you might think, though. With a bit of knowledge and some practice, you’ll be able to shelter in the woods like anyone with just a tarp and some paracord.
The Complete How-To Camp With Just a Tarp Guide
There’s a lot to know. I’ll walk you through the entire process of selecting the gear and setting up your tarp so you have all you need so you can camp with just a tarp with the best of them.
Selecting A Tarp For Your Shelter
Let’s figure out what kind of tarp we need to shelter with a tarp.
By the way, as an Amazon Associate, I earn when buying qualified products through links on my site.
How Big a Tarp Do I Need?
For a shelter for one person, you should at least plan on a tarp of 10×7 feet, but you will definitely appreciate having a 10×10 or larger tarp.
If you’re backpacking, then you need to find the sweet spot of weight vs. size of tarp that works for you. Remember that a tarp may cover you, but if there’s any wind, it can soon defeat your shelter and you’ll be wet and cold if your tarp is too small.
What Kind Of Tarp Do I need?
When I first heard about tarp camping I thought you could just go to Home Depot and buy a tarp for $15-30 and be ready for anything.
This is still true, but it turns out that tarps are not created equally. The standard blue or brown tarps you buy at Home Depot (click links to see them) are actually different thicknesses and they are made of polypropylene, which is water impervious but has some of its own issues on its own. A tarp from Home Depot will run you from $15-40 depending on the size and thickness.
You can actually spend hundreds of dollars on your tarp. For example, Kammock sells a fantastic tarp here (see it at REI) that is top quality.
What’s the Difference Between a $10 tarp and a $200 tarp?
The differences are in features and in the material. The nice tarps are made of Silnylon and have Ripstop technology so they can withstand a few pokes from sticks and rocks without getting holes. Furthermore, the nicer tarps are much lighter, which makes them ideal for wilderness backpacking.
Perhaps most importantly, high-quality tarps have very sturdy tie-off points made for sheltering. While a 10×7 tarp from Home Depot will have normal grommets, I’ve noticed that these grommets wear down the fabric and rip with not that much use.
The Kammock tarp I linked above actually has built-in tensioners so you can set up your tarp without having to use any knots. What’s the fun in that, though?
Also, the high-quality tarps stretch, something that normal polypropylene tarps don’t do much of. This means that a big wind is less likely to tear your tarp to shreds.
Whether you choose the $20 tarp vs. the $200 tarp, a knowledge of knots and how to set it all up will serve you well.
Selecting A Spot To Set Up Your Tarp
Pick a spot between two trees (or other anchor points) that extend at least 5-7 feet off the ground, and are anywhere from 10-20 feet apart.
The amazing thing about setting up a tarp shelter is that depending on your length of rope, you set up your tarp just about anywhere you can find an anchor point. Even if there are no trees, if you can find a boulder that comes off the ground several feet, you can use this to create a shelter.
If you’re just starting out, finding two trees 10-20 feet apart is a good starting point because you can use a ridgeline (see here if you aren’t familiar with the term: ridgeline)
Choose Your Tarp Formation (Plow-Point, Flat, etc)
The tarp formation you choose will determine how hard it is to set up a tarp. The simpler the formation, the easier it will be to build your shelter.
Are you tired of not knowing which knot to use and when? Check out my free 5-day knot course! You will learn 1 essential knot per day with detailed video and picture instructions. And you’ll get it in your email! Check it out here.
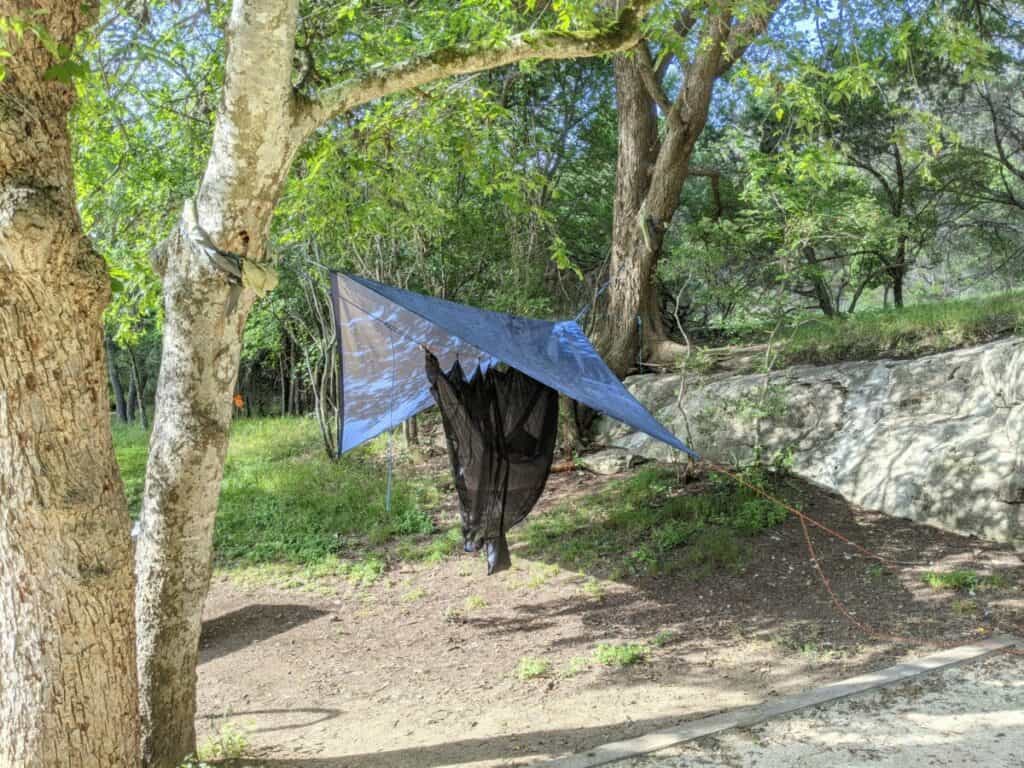
Flat Tarp Shelter
One of the simplest tarp shelter formations is a flat shelter. See this picture for an example:
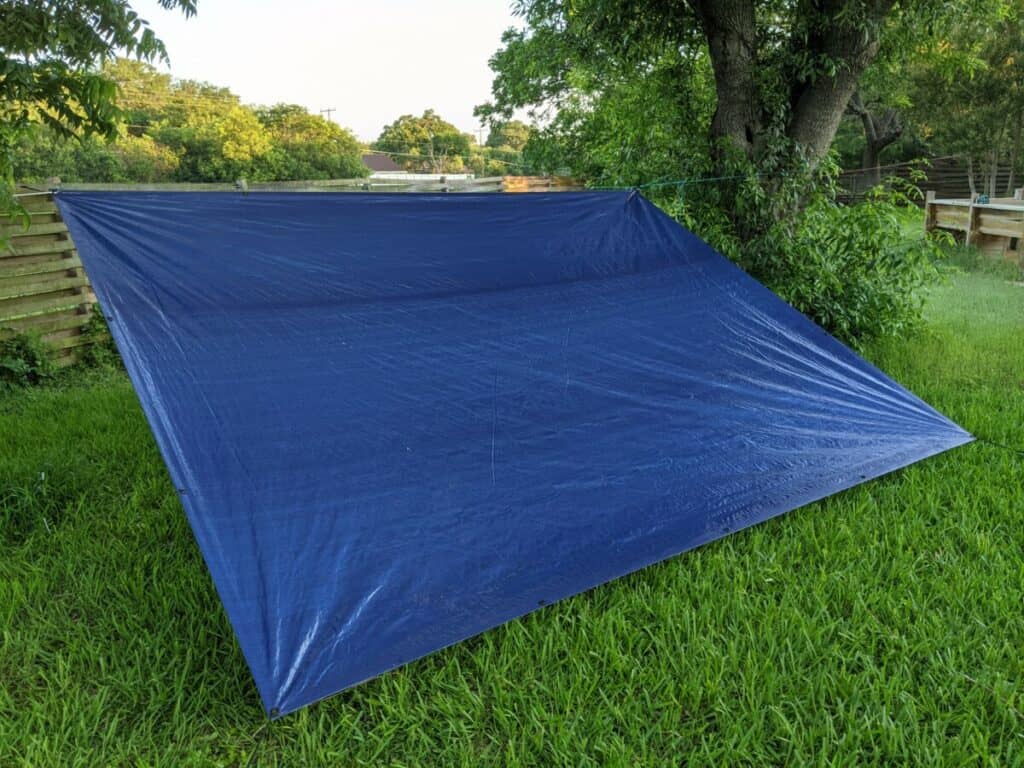
Notice how the the two edges of the tarp are attached to the ridgeline, while the other two edges of the tarp are stretched taut diagonally towards the ground. You can anchor directly into the ground, but I find it’s easier to use a loop attached to the grommet to stretch the tarp taut.
A flat shelter like this one is one of the most basic and is a great shelter especially if you can set up the tarp so it blocks any wind.
To tie a flat tarp shelter:
- Tie a ridgeline between two anchor points. A height between 3-5 feet works well. –(see here to learn how to tie a ridgeline)
- Use two short loops of thin rope (can be paracord or utility line) to tie Prusik knots to the main ridgeline on both ends of the ridgeline where the tarp will go. (doesn’t have to be in the exact right position since you can adjust them as needed) –(see here to learn how to tie a Prusik knot)
- Attach the tarp to the two loops tied with prusik knots with a toggle
- Attach the opposite corners of the rectangle or square of the tarp to the ground by either anchoring the tarp edges or tying loops to the corners of the tent and anchoring the loops
- Make tarp taut by moving the prusik knots away from each other
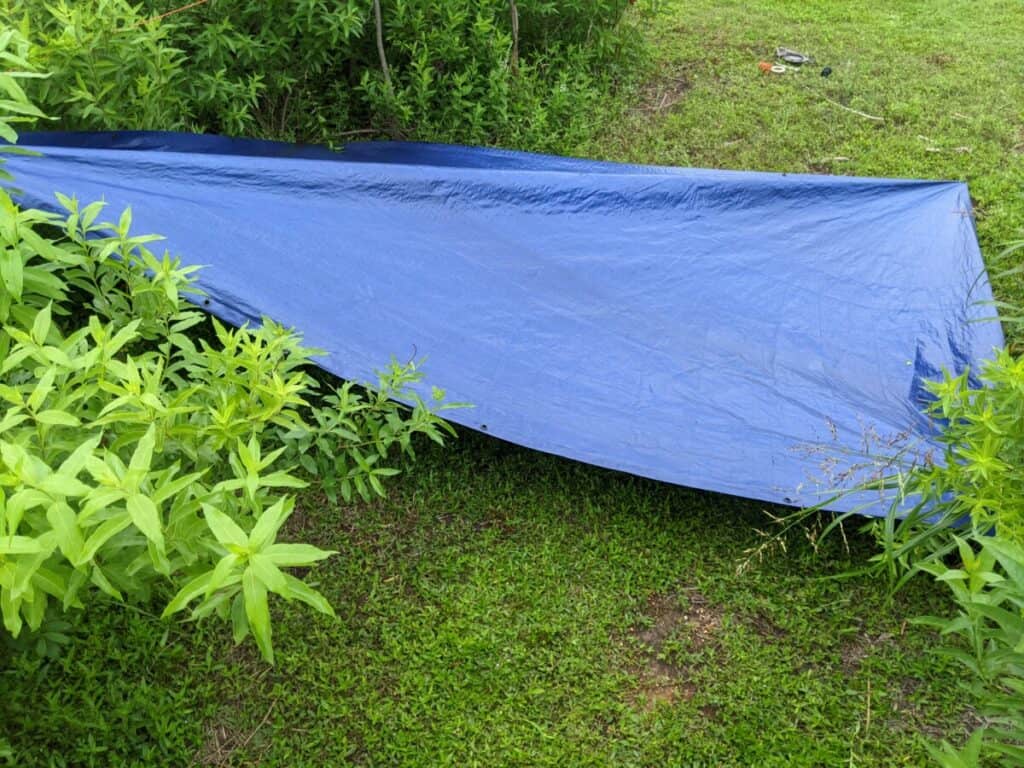
Plow Ridgeline
You can set up your tarp so the tarp goes diagonally over a ridgeline (so it forms a diamond in reference to the ridgeline)
The plow ridgeline tarp formation is a great shape because you can set it up high enough to fit a hammock underneath it, or you can set it up much lower if you want to sleep on the ground. This requires a ridgeline taut enough and strong enough to support your tarp.
Have you wondered what the difference is between a strong knot and a secure knot? Check out my articles here on strong knots and secure knots.
To Tie a Plow Ridgeline
- Tie a Ridgeline between two anchor points. If you want to hammock underneath the plow ridgeline you will need to be anywhere from 5-8 feet high
- Set the tarp diagonally across the ridgeline so that the tarp forms a diamond in reference to the ridgeline. (you may have to get the tarp onto your ridgeline before you tighten the ridgeline if your ridgeline will be too high to reach when tightened)
- Fasten the two corners of the tarp that are ON the ridgeline to the ridgeline with prusik knots (you may have to do this before you tighten the ridgeline if the ridgeline will be too high to handle.)
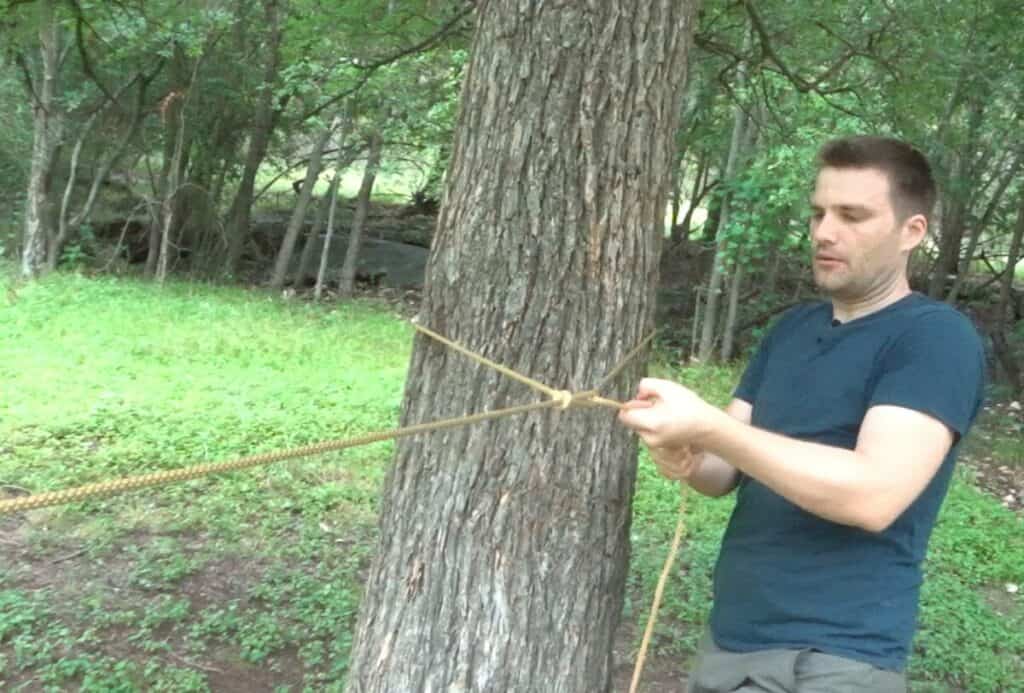
- Anchor the two sides of the ridgeline with paracord (see the picture of my hammock set up to see how the orange paracord has one side of the tarp secured on the right).
- Make tarp tauter by spreading the prusik knots away from each other
Plow Shape
One really cool thing about the plow shape is that you actually only need one anchor point above the ground.
If your rope is taut enough, this is a solid shelter that will stay put, especially when the open end of the shelter is facing away from the wind.
How To Tie a Plow Tarp Shape
- Tie a ridgeline from one anchor point above the ground. This can be anywhere from 4-8 feet. The other anchor point can be anchored into the ground. If you’re using a tent stake for a ground anchor, push the tent stake towards the opposite end of the ridgeline for more security.
- Drape the tarp diagonally over the ridgeline
- Fasten the two corners of the tarp ON the ridgeline to the ridgeline with prusik knots
- Bring the two remaining corners of the tarp to the ground and anchor them directly with tent stakes or by tying a loop to the corners and anchoring the loop.
- Make the tarp taut by moving the prusik knots away from each other
How To Tie a Ridgeline
Before I closed out this article I wanted to give you a quick tutorial on how to tie a ridgeline.
A ridgeline is essentially a taut rope between two anchor points. It’s a fundamental shape that’s a part of several shelters.
There are several ways to make a taut ridgeline, but this particular method includes a trucker’s hitch.
- Tie a loop at the end of a rope
- Wrap the end of the rope (with the loop you just tied) around a tree or other anchor point
- Feed the opposite end of the rope through the loop to form a girth hitch around the tree
- Now that you have one side of the rope anchored to the tree, wrap the other end of the rope around another anchor point (like another tree).
- Create an anchor point in the rope by using a slip knot or some other loop, you are going to put the working end of the rope through this loop and make a pulley
- Pull the (now) pully rope through the anchor point on the rope away from the first tree.
- Tighten the rope as much as you can, and when it’s taut enough, tie off the rope to itself with one or two half hitches.
You now have a taut ridgeline between two anchor points!
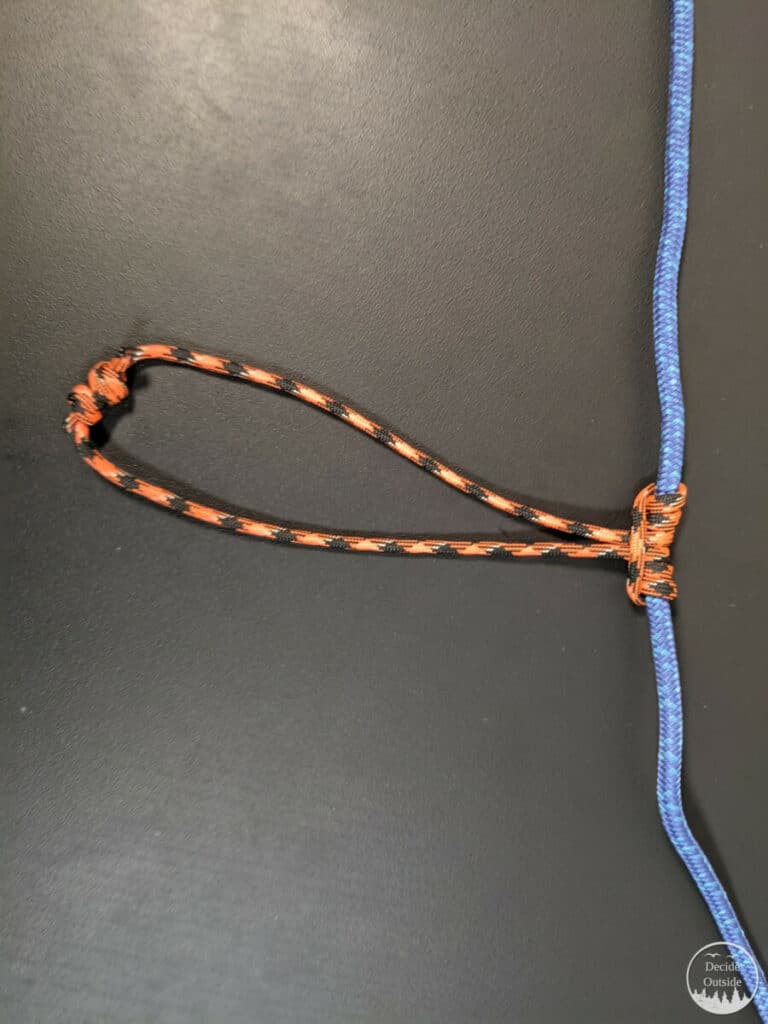
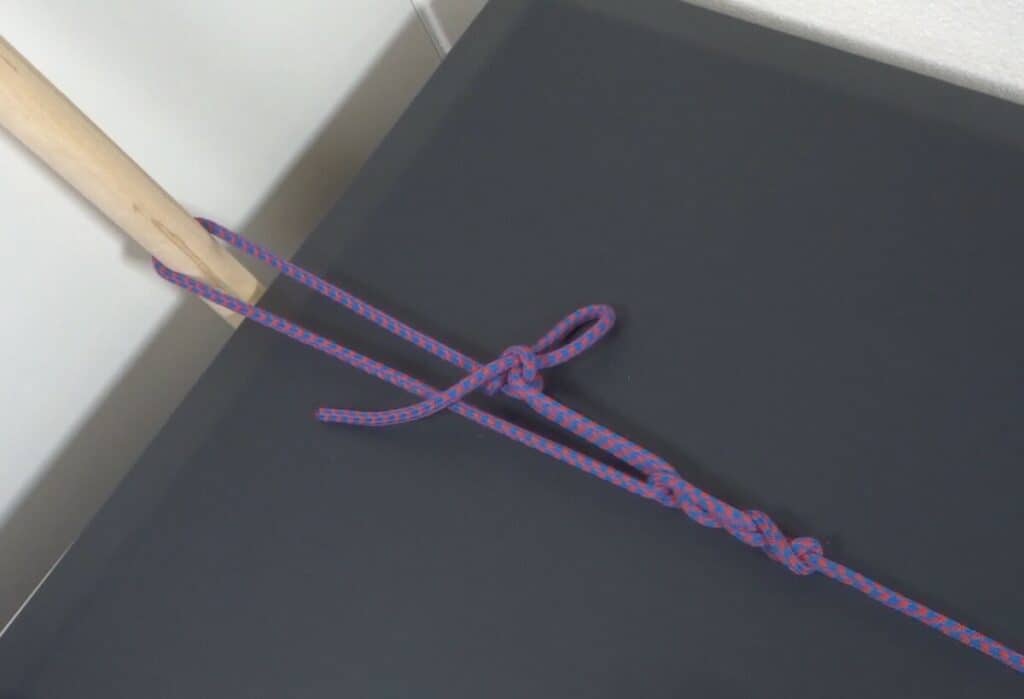
How To Tie a Prusik Knot
A prusik knot is a way to make an adjustable anchor that you can attach to a ridgeline. With adjustable anchors you can tighten the tarp and make it taut by pulling the anchor along the ridgeline.
To make a prusik knot:
- Make a sling by tying two ends of a short rope to one another, forming a loop
- Place the loop behind the ridgeline, hold the top of the loop in one hand during the duration of the tying
- Take the bottom of the loop and wrap it over and around the ridgeline (passing through itself). Wrap it 3-4 times
- Make sure that the wraps are causing the ropes to lie parallel to each other, the lines should not be overlapping.
- Pass the top of of the loop you have been holding and pass it through the opposite end of the loop across the ridgeline