Nasty heel blisters every time you hike? Learn some prevention methods here to keep your feet comfortable for the entire hike.
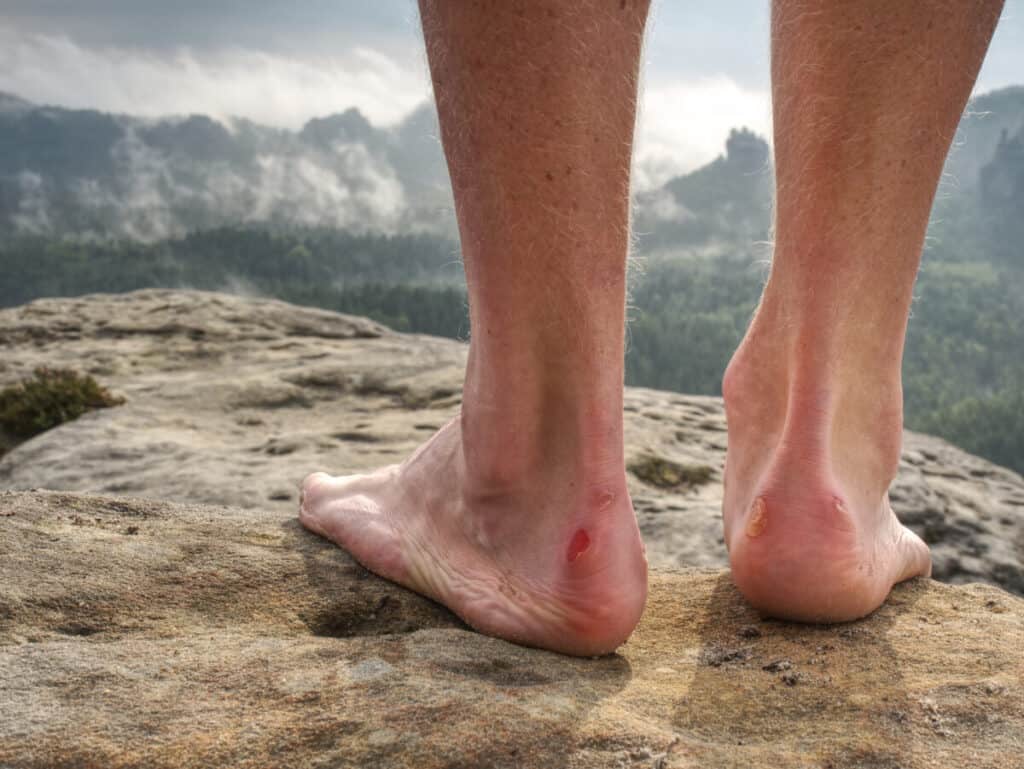
Hiking heel blisters can be prevented by hiking shoes that do not rub your heels as you walk, using non-friction hiking socks and sock liners, and toughening up your feet so they are less prone to blisters. Typically, heel blisters are caused by your heel rubbing against your shoes so finding ways to protect your heels is essential.
Heel blisters are painful, annoying, and they come with a risk of infection. Even if you’re usually able to treat them pretty easily, they can be a huge problem when you’re trying to finish out your hike. Consequently, learning how to keep them from forming to begin with is a huge benefit.
By the way, as an Amazon Associate, I earn when buying qualified products through links on my site.
Continue on and you’ll learn all about what causes heel blisters, how to prevent them, and what you can do to treat them effectively.
Outdoors Magic weighs in here:
Reasons Why You Are Getting Heel Blisters While Hiking
Heel blisters are annoying, painful, and can keep you from having a good time out on the trail. If they get too painful, they can even keep you from finishing your hike. Because of that, it only makes sense that you’d want to learn how to keep them from showing up.
Before you can prevent heel blisters that come from hiking, it’s important to know what exactly causes them. Is it just that your feet aren’t used to the extra effort, or do you need a new pair of hiking shoes? If blisters on your heels have become a problem, take a look at the following factors. They might provide just the insight you need to prevent more heel blisters from popping up.
Your Feet Aren’t Used To Hiking
If you haven’t been out for a while or are brand new to hiking, there’s a good chance you’ll experience some blisters as your feet get used to the extra work. While blisters are never fun, it can be helpful to know that it may just be part of the process of your body warming up to hiking more regularly. If that turns out to be the case, you should stop getting blisters as often over time.
So if you get a blister on your hike, don’t panic and buy new shoes. It may not be the shoes at all. Some people have the fortune of never seeming to get blisters, while some have the misfortune of getting them all the time.
That said, you may find that you have to go through the process again if you take a break from hiking regularly for too long. For example, those who stop during the colder months may need to take the time to toughen their feet up again once spring rolls around. With the help of the tips I’ll list later on, you should be able to limit the pain those fresh blisters will cause.
Hiking Boots Or Shoes That Aren’t Tight Enough (Use The Ice Skate Method)
When you put on your hiking boots or shoes, sometimes it’s tempting to lace up your shoes like you do your casual shoes. If you’re like me, you tighten your casual shoes just enough so the laces don’t get in the way and your shoes don’t fall off.
When you’re hiking, you need to tighten the laces across the entire shoe. That means that instead of pulling the laces hard at the end of the shoe, you need to perform the Ice Skate Method.
Here’s the Ice Skate Method:
If you’ve ever gone ice skating, you’ve learned this lesson. You have to tighten the ice skates across the entire boot from the front of the shoe to the bottom. Pull the laces tight near the end of the shoe and then work your way backward going through each line of of the laces until you reach the back of the shoe where you normally tie your shoe.
I use the Ice Skate Method as a reference to understand that you have to tighten the hiking boot or shoe all along its length, not just where you tie your shoes at the end. That being said, you should not tighten your hiking boot or shoe as tight as you tie your ice skates.
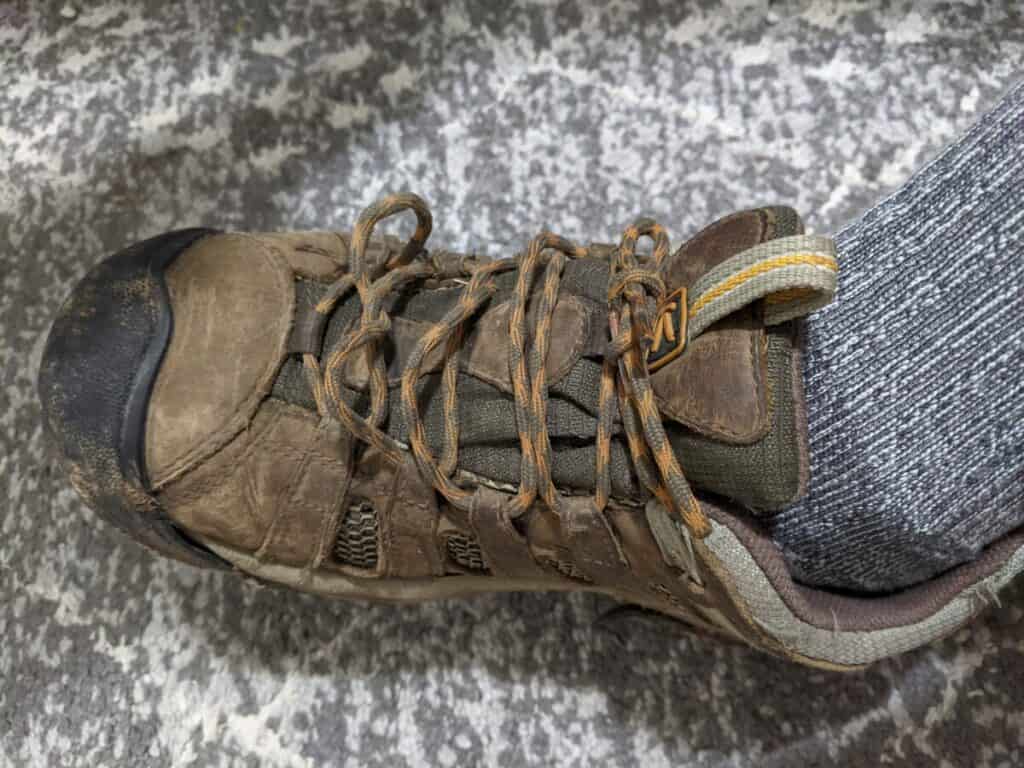
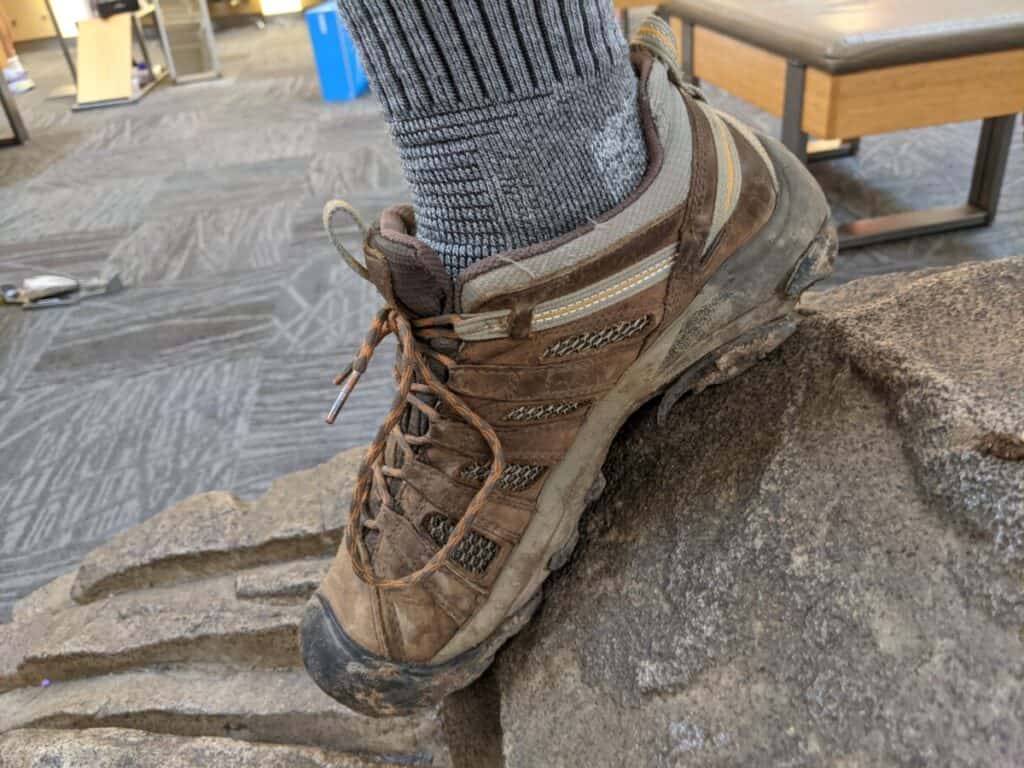
For example, here is an exaggerated pic of my Keens untightened:
And here is what it looks like when I snug up the laces:
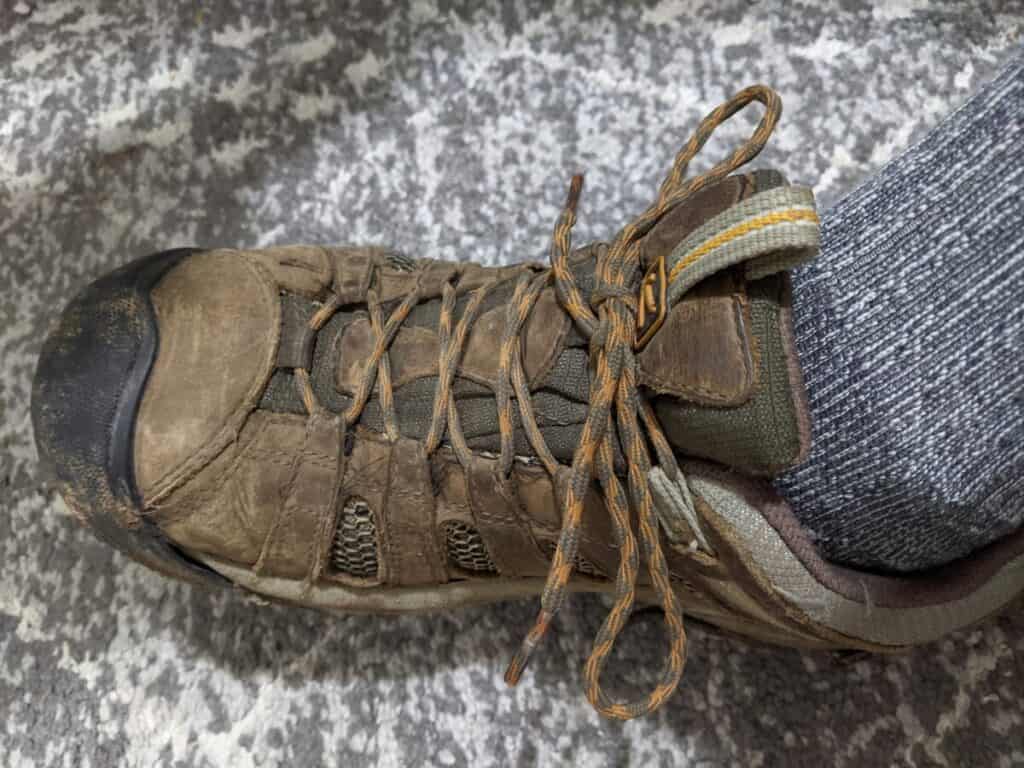
Hiking boots or shoes should have a snug fit, but you shouldn’t feel like your shoes are squeezing your feet excessively. Your heel (and foot in general) should not be sliding around very much at all.
Hiking Boots Or Shoes That Don’t Fit
If your hiking boots or shoes are tightened properly, then it’s important to check for fit. Here are some quick tests and tips you can do to find out if your hiking boots or shoes fit properly:
- Walk down a steep ramp. If your toes are mashed into the front of your shoe, your boot/shoe is too small
- Walk up and down a steep ramp. If your tightened boot or shoe (see the above section) is still popping off your heel, then you have a good chance you’ll get heel blisters from these boots/shoes (hiking boot/shoe is too big for you)
- Your toes are crowding one another: If your toes are bunched up against one another then your boot/shoe is too small
- The ball of your foot is shifting as you walk: If you can feel the fall of your boot shift left or right on tightened boot or shoe, your footwear is too big.
Poorly-fitting shoes can be a problem in any situation, but it’s even more of an issue when you’re spending time in rugged terrain. Hiking boots (or shoes) that aren’t the right fit can rub against your skin, creating hot spots. Many hikers are well aware that a prime place for these hot spots to pop up is on the heels.
The longer that rubbing continues, the more damage is done to your heels. Not only is this irritating, but it’s also hard on the nerves and muscles in your feet.
You Need Different Socks
The socks we typically wear on a day-to-day basis may not be able to stand up to the stress of hiking. While we’re out on the trail, there can be more heat, friction, and moisture than standard cotton socks are able to handle. As a result, they may wear out or otherwise result in more of that friction being transferred to your heels. Consequently, you end up with hot spots or blisters.
The good news is that socks are generally less expensive to replace than hiking boots or shoes, and there are a variety of other tools you can use to help with keeping your heels protected. I’ll cover all of these options in the next section.
How Do You Prevent Heel Blisters When Hiking?
As annoying as heel blisters are, they can absolutely be prevented. It all boils down to figuring out what is causing the blisters. If you’re having trouble figuring out exactly what’s going on, it may take a few tries to figure out what works for you. Additionally, if you find that what you need is new shoes, you might have to try out a few different pairs before discovering the correct fit.
Whatever it is that’s causing your heel blisters, the following solutions can help you to keep your feet safe and sound during your future hiking trips.
Find The Right Shoes For The Job
Before you head out onto the trails, it’s incredibly important to make sure you choose hiking boots or shoes that fit your feet perfectly. While you’re shopping, it never hurts to get help from an employee with a solid understanding of how shoes should fit. Let them know what you need them for, and try out using a boot ramp to see how comfortable any hiking boots will be as you’re walking uphill or downhill.
Keep in mind that, although there are a number of popular brands for both hiking shoes and hiking boots, the brand itself might not determine that it’s the right fit for you. Popular brands might be made with higher quality materials, but you’ll still need to know that the shoes won’t rub against your heels. They’ll also need to be flexible enough to remain comfortable for the entire hike.
Some things to consider:
- The overall size of the boot/shoe. 11s are going to be bigger than 10s. If your toes are touching the end of your shoes, go a half or whole size up until you have about an inch gap between your toes and the end of shoe
- The width of the boot/shoe. I didn’t know this until I started buying hiking shoes that many shoes actually have a width described as a letter. (D for example is considered regular, A is considered narrow, and E is considered Wide). Sometimes a number before the letter is shown. 2E is less wide than 4E for example. (I have to use 4E)
- The design of the boot/shoe. No matter how much effort you put into getting the right specifications, some designs just don’t work out. It’s one of those things you have to do in person. Everybody’s feet are so different from one person to the next and so it’s vital to experiment on your own.
For example, for years I’ve used my Keen Voyageurs (you can see them on Keen’s website, here for men’s, and here for women’s), and I tried several of the top brands including Merrell and Salomon–and even though I tried the wide editions for several shoes, I still had the toe crowding problem where my index toe would go under my great toe (my … index toe? What’s that thing called?). Keen was the only brand where the toebox was big enough for my toes to move around without any issues.
But, what works for me might not work for you, so you have to go try some out. REI (click here to see their hiking shoes) has a top-of-the-line selection for hiking shoes and hiking boots, and they usually have ramps and other equipment to help test out the fit of the shoe. Even if you don’t purchase your shoes or boots there, it’s a fantastic place to go try them on.
Opt For Hiking Socks
Typical cotton socks can have a tough time standing up to the trials of hiking. While you’re out on the trail, your feet can be subjected to a lot more friction, heat, and even humidity, than they would in a regular daily setting. Additionally, it’s even more important to keep your feet protected if you want to keep using them for your regular hikes without any problems.
Instead of standard socks, it’s a good idea to try out some hiking socks. These socks are often made very differently. They’re thicker than typical socks and are often made out of a combination of a stretchy material (like lycra or nylon) and quality Merino wool. Due to their design, hiking socks offer more durability, cushioning, and the ability to keep your feet dry and comfortable. If you want to learn more about how helpful hiking socks can be on the trails, take a look at our article here.
To summarize my own experience. I would often wear my standard cotton socks that I wore everywhere, and I found that when the socks got wet they became sticky and thus more abrasive. Blister-city would have been a good way to describe that experience. Since I’ve been wearing hiking socks while hiking, these problems have righted themselves.
Protect Your Heels with Inserts or Heel grips
Aside from getting the right shoes and socks, there are a few different ways you can protect your heels from damage. Some hikers like to get ahead of the game and add a layer of moleskin, athletic tape, or even Bandaids onto their heels so that there won’t be a chance for any uncomfortable rubbing to begin. These are great options because they tend to be inexpensive and you can easily bring along some extra just in case you need to replace them.
There are also a variety of silicone inserts (example on Amazon) you can try out to keep your heels comfortable. If you try out this option, just make sure that the insert fits comfortably into your shoes. Furthermore, try them out for shorter walks first as some people can end up getting blisters from the inserts themselves.
Another option is a heel grip. These small devices help keep your heel in place, especially if the boot is just a touch too big. Check out several options on Amazon, here.
This is an example of a heel insert from Dr. Foot on Amazon:

Try Some Sock Liners
There are many hikers out there who swear by using sock liners (REI) to protect their feet. If you’ve never heard of a sock liner before, you can essentially think of it as a sock for your sock. You put on the sock liners, which are often made of thinner polyester, nylon, wool, or some combination therein, and then you can put on your hiking socks.
While this might sound like overkill, the sock liners are designed to fit very snugly and help to avoid friction against your skin. On top of that, they can also help with wicking away moisture and adding just a little bit more cushion for your feet. If your hiking shoes or boots aren’t the absolute best fit, using both hiking socks and sock liners can prevent some of the friction of your heels from rubbing against the back of the shoe too much.
As always, bad fitting shoes can only be helped so much. If possible, make sure your shoes are snug before resorting to other solutions.
As a personal anecdote, my brother has started wearing thin neoprene socks when he hikes as a sock liner and he says all his blister problems have disappeared. Neoprene socks are an interesting choice for hiking and we talk more about them here.
Toughen Up Your Feet
Because so many current shoe options are built to keep our feet protected and comfortable, many people may notice that they might be more prone to foot pain or blisters while they are hiking. Naturally, hiking is a bit tougher on your feet than walking around on the sidewalk.
Those who are serious about making their feet as tough as possible can try walking, running, or hiking without any shoes at all. If you opt for this method, just be careful to make sure there isn’t any sharp or dangerous debris in the area. Other hikers may try to help their feet form callouses. While they may not be the most appealing, callouses do a great job of protecting your feet from damage.
For more tips on how to toughen up your feet for hiking, take a look at our article on the topic here.
Investigate Any Foot Pain In a Short Hike
To make sure your hiking boots are working out well, you might want to try out just a few shorter hikes. If you notice that you’re having some foot pain as you’re hiking, take the time to stop and investigate the cause. This is a good way to find hot spots before they have a chance to get worse. You’ll also be able to stop sooner, treat them, and find a solution for the situation.
It’s possible that your shoes might need to be worn in more, or that you have to keep looking for the ideal pair for hiking. When you’re trying out new hiking shoes, bring along some basic first aid to keep any chafing or rubbing from creating injuries on your heels.
Maintain Your Temperature
There are three factors that typically play a role in creating blisters on your feet. These include moisture, friction, and temperature. Blisters can also form by being pinched or irritated in other ways, but friction tends to be the most common culprit, especially when it comes to blisters that form on the heels.
Keeping your feet as dry and comfortable as possible can help to avoid blisters, or at least keep them from getting too serious. Combining a solid pair of moisture-wicking socks with more breathable shoes is a great way to keep your feet from getting too hot. If you opt for Merino hiking socks, they will also aid in regulating the temperature of your feet.
We talk about the sweaty foot problem in another article. Even if your shoes fit great, you might still get sweaty feet! We talk about several tips on how to manage this in our article, here.
Can You Hike With Blisters?
If you’re like many hikers out there, you may not want to stop the hike just because you have a hot spot or blister. The good news is that as long as you’re well prepared, you can typically finish out the hike without causing too much of a problem.
To begin with, check out any heel pain you’re experiencing as quickly as possible. The sooner you catch a hot spot forming, the easier it will be to get it treated and covered so you can get back on the trail. Most often, you’ll be able to recognize a hot spot on your heel because the skin will be red and irritated. If you clean it up and cover it at this point, you should be okay to complete the hike.
In some cases, a blister may have already formed by the time you’re able to stop and check it out.
WebMD recommends not popping the blister because your skin protects your body from infection. From personal experience, that’s not always possible. Popping a blister in the wilderness, intentionally, may lead to infection so it’s very important to use sterilized equipment (fire is your best sterilizer in these situations) if you must pop a blister.
If you do drain a blister, make sure to keep the hole as small as possible to avoid anything getting into the wound. Clean it up well and cover it. At this point, it’s also a good idea to take breaks from time to time to make sure the blister isn’t getting worse.
The reason it’s important to try to catch the blister as early as possible is to avoid it popping on its own. If that happens, it’s more likely you’ll have an open wound that risks infection. At this point, it may be worth considering cutting the hike short so that you can rest it and keep the wound as clean as possible.
Treating Heel Blisters
Whether you already have blisters or end up getting some while you’re trying out new prevention methods, it’s important to know how to treat them safely and efficiently. If you aren’t careful, blisters can create lasting damage or become infected.
The next time you end up with a nasty heel blister, use the following steps to help it heel safely.
Look At How The Blister Formed
Before you start treating any blisters you have currently, make sure to do a little investigating. Check out where the blister is, what kind of blister you have, and how it might have been created.
As you’re treating the blister, find a way to prevent further damage. For example, change shoes or add a layer of protection to any heel blisters that might have been caused by friction.
This step is something you’ll want to keep in mind so that you can decide whether you’ll need new shoes or just something like sock liners to avoid more blisters in the future.
Clean It Up
If your hiking trip has resulted in a heel blister, it’s important to take care of it before it gets worse. The worse a blister gets on its own, the higher the chances are that it could become a real problem. Your first step is going to be to get the area clean. It’s possible that the blister might pop at some point. If that happens, you won’t want any bacteria getting into the open wound.
According to WebMD, the blister should only be bandaged loosely after the area has been gently cleaned. The website also states that you should not drain a blister yourself unless it has become too painful, big, or it continues to get in the way and cause you more problems. If you do decide to pop the blister on your own, you’ll need plenty of rubbing alcohol and antibiotic ointment nearby to make sure this process is clean and effective.
Cover It
If you can let the blister heal without any covering safely, that’s the method that is the most recommended. However, that may not be the case when you need to go to work, or if you’re still on the trail. In that case, you’ll want to make sure the bandage you use isn’t too tight. Additionally, try to provide some cushion for your heel against your shoe. That way, it won’t continue to add pressure or friction to the wound.
The American Academy OF Dermatology website recommends that you try to shape any padding you use so that it doesn’t put pressure on the blister itself, but instead surrounds and protects it. For example, something like moleskin cut into a donut shape.
Rest Your Feet
The best way to help blisters to heal is to rest your feet for a while. If you can, leave your shoes off or put on some shoes that won’t rub against your heels. If the blister is bad enough, that might mean you have to stop your hike early. On the other hand, if you’re able to stop and provide some basic first aid to keep the blister from getting worse, it’s possible to finish your out your hike before going home to rest.
Ultimately, the decision is going to be up to you. Just keep in mind that damage to your heels can become more than just an annoyance. Heel blisters can become infected and cause some serious damage if left untreated. According to medical news today, blisters that are infected will turn green, yellow, or even purple. If you notice that your blister is starting to look infected, it’s best to make an appointment with your doctor.